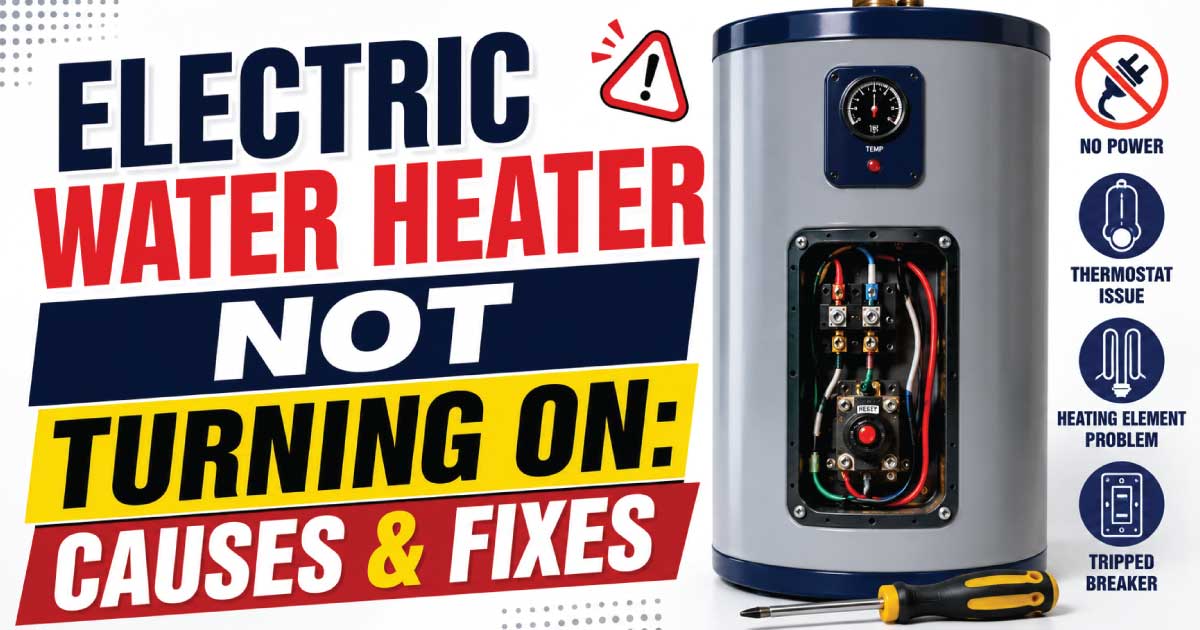
An electric water heater not turning on is one of the most frustrating problems a homeowner can face. One moment you have reliable hot water for showers, laundry, and dishes, and the next you’re left with only cold water. In many cases, the issue is caused by something simple, such as a tripped circuit breaker or a reset button that needs attention. However, it can also point to a faulty heating element, thermostat failure, wiring problem, or another electrical issue that requires careful diagnosis.
The good news is that many common water heater problems can be identified with a logical troubleshooting process. Understanding how the system works makes it much easier to recognize warning signs and determine whether the repair is safe to handle yourself or if it’s time to call a professional.
In this repair guide, you’ll learn the most common reasons an electric water heater stops working, the symptoms to watch for, essential safety precautions, the tools you’ll need, and a step-by-step troubleshooting process that helps narrow down the cause before replacing any parts unnecessarily.
Common Signs and Symptoms
When an electric water heater stops working, the symptoms can vary depending on which component has failed. Paying attention to these signs helps narrow down the problem before beginning any repairs. Rather than replacing parts at random, start by identifying exactly what the heater is doing—or not doing.
Common symptoms include:
- No hot water at all.
- Water remains cold even after several hours.
- Circuit breaker trips repeatedly.
- Water heater appears completely dead.
- Reset button frequently trips.
- Hot water runs out much faster than normal.
- Heater makes no sound when power is available.
- Burnt smell near the electrical access panels.
- Visible scorch marks on wiring.
- Intermittent hot water that suddenly becomes cold.
- Heating takes much longer than usual.
- Indicator lights (if equipped) remain off.
You may also notice secondary warning signs around the home, such as:
- Higher-than-normal electricity bills.
- Water temperature changing unexpectedly.
- Hot water only available from some fixtures.
- Warm water instead of fully hot water.
For example, if your water heater produces a small amount of hot water before turning cold, one heating element may have failed. If there is no hot water whatsoever and the heater shows no signs of life, the problem often starts with the electrical supply, high-limit reset switch, or thermostat.
Recognizing these symptoms early helps prevent unnecessary replacement of expensive components and reduces the risk of further damage.
How the Appliance or System Normally Works
Before diagnosing a fault, it helps to understand how an electric water heater normally operates. Once you know the heating sequence, identifying the failed component becomes much easier and more accurate.
A standard electric storage water heater relies on several key parts working together:
- Electrical power from your home’s breaker panel.
- Thermostats that monitor water temperature.
- Upper and lower heating elements.
- High-temperature safety reset switch.
- Internal wiring.
- Water tank insulated to retain heat.
Here’s the normal operating sequence:
- Power flows from the home’s electrical panel to the water heater.
- The upper thermostat checks the water temperature.
- If the water is cold, the upper heating element activates first.
- Once the top portion of the tank reaches the target temperature, power transfers to the lower thermostat.
- The lower heating element heats the remainder of the tank.
- When the desired temperature is reached, both elements switch off until reheating is needed.
This process repeats automatically throughout the day.
If any part of this sequence is interrupted—whether by loss of electrical power, a defective thermostat, a burned-out heating element, or a safety device shutting the unit down—the water heater may stop producing hot water altogether.
Understanding this basic operation prevents guesswork during troubleshooting because each symptom often points toward a specific stage in the heating cycle.
Most Common Reasons This Problem Happens
Most electric water heater failures are caused by a relatively small number of electrical or mechanical issues. Starting with the most common causes saves time and helps avoid replacing parts that are still working properly.
Tripped Circuit Breaker
A water heater typically uses a dedicated 240-volt circuit. If the breaker trips, power cannot reach the heater.
Why it happens
- Electrical overload
- Short circuit
- Faulty heating element
- Aging breaker
Symptoms
- No hot water
- Heater completely inactive
- Breaker handle sits between ON and OFF
How to identify it
Inspect the home’s electrical panel. Reset the breaker once. If it trips again immediately, another fault is likely present and should be diagnosed before restoring power.
Tripped High-Limit Reset Switch
The reset button is designed to shut the heater down if water becomes excessively hot.
Why it happens
- Faulty thermostat
- Overheating
- Loose electrical connections
Symptoms
- Sudden loss of hot water
- Heater worked normally before stopping
How to identify it
Remove the upper access panel after disconnecting power. Press the reset button. A noticeable click often indicates it had tripped.
Failed Heating Element
Electric water heaters usually contain two heating elements. Either one can fail over time due to mineral buildup or normal wear.
Why it happens
- Age
- Hard water deposits
- Dry firing after tank drainage
Symptoms
- Limited hot water
- Slow heating
- No hot water if multiple failures occur
How to identify it
A multimeter can test the element for continuity and resistance after power is disconnected.
Defective Thermostat
The thermostats control when each heating element turns on and off.
Why it happens
- Internal electrical contacts wear out
- Heat damage
- Manufacturing defects
Symptoms
- Water too cold
- Water excessively hot
- Inconsistent heating
How to identify it
Voltage testing and continuity checks help determine whether the thermostat is functioning correctly.
Loose or Burned Wiring
Years of heating and cooling cycles can loosen electrical connections.
Why it happens
- Vibration
- Heat expansion
- Corrosion
Symptoms
- Burn marks
- Melting insulation
- Burning odor
- Heater randomly stops working
How to identify it
After disconnecting power, inspect accessible wiring for discoloration, loose terminals, or damaged insulation.
Faulty Power Supply
Sometimes the problem isn’t inside the water heater at all.
Why it happens
- Blown fuse
- Failed disconnect switch
- Damaged wiring from the electrical panel
Symptoms
- No voltage reaching the heater
- Reset button does nothing
How to identify it
A voltage test confirms whether the heater is receiving its required power supply.
Safety Precautions Before Troubleshooting
Electric water heaters combine high voltage and water, making safety the first priority. Even a simple inspection should begin with precautions that reduce the risk of electric shock, burns, or equipment damage. Never assume the unit is safe simply because it isn’t heating water.
Before beginning any troubleshooting:
- Turn off the dedicated circuit breaker supplying the water heater.
- Verify power is off using a non-contact voltage tester or multimeter.
- Never touch exposed electrical terminals until you’ve confirmed they are de-energized.
- Allow hot water inside the tank to cool if overheating is suspected.
- Keep the surrounding floor dry to reduce shock hazards.
- Wear insulated gloves and safety glasses.
- Use insulated hand tools whenever possible.
- Replace all access covers before restoring power.
- Never energize the heater if the tank is empty, as heating elements can burn out within seconds.
- Stop immediately if you see melted wires, smoke, or signs of severe overheating.
DIY is generally appropriate for:
- Checking the circuit breaker
- Pressing the reset button
- Visual inspections
- Basic electrical testing if you are comfortable using a multimeter
Professional repair is recommended for:
- Major wiring damage
- Repeated breaker trips
- Electrical burning smells
- Tank leaks
- Uncertain voltage testing
- Complete electrical diagnosis
Working carefully is far less expensive than replacing damaged components caused by unsafe troubleshooting.
Tools Required
Having the proper tools ready before starting makes the troubleshooting process faster and more accurate. Most homeowners already own several of these basic tools, while a few electrical testing tools can greatly improve diagnosis.
| Tool | Purpose |
|---|---|
| Screwdriver set | Remove access panels and covers |
| Digital multimeter | Check voltage, continuity, and resistance |
| Non-contact voltage tester | Verify power is off safely |
| Flashlight | Inspect dark areas around wiring and components |
| Needle-nose pliers | Handle electrical connectors |
| Adjustable wrench | Tighten accessible fittings if needed |
| Safety glasses | Protect eyes during inspection |
| Insulated work gloves | Reduce risk of electrical contact |
| Camera or smartphone | Photograph wiring before disconnecting anything |
| Owner’s manual | Reference wiring diagrams and specifications |
Step-by-Step Troubleshooting Guide
Troubleshooting an electric water heater works best when you follow a logical order. Starting with the simplest checks often reveals the problem quickly and prevents unnecessary disassembly or replacement of working parts.
Step 1: Confirm the Heater Has Electrical Power
What to inspect
- Circuit breaker
- Disconnect switch
- Indicator lights (if present)
Why it matters
Without power, none of the internal components can operate.
Expected result
Breaker remains fully ON.
What to do next
If power is available, continue to the reset switch.
Step 2: Check the High-Limit Reset Button
What to inspect
Remove the upper access panel and locate the reset button.
Why it matters
The safety switch shuts off heating if excessive temperatures occur.
Expected result
The button should not be tripped.
What to do next
If it clicks and the heater starts working afterward, monitor it closely because another component may have caused the overheating.
Step 3: Inspect Visible Wiring
What to inspect
Look for:
- Loose terminals
- Burn marks
- Melted insulation
- Corrosion
Why it matters
Damaged wiring interrupts power and can create serious safety hazards.
Expected result
Connections appear tight and undamaged.
What to do next
Repair or replace damaged wiring before restoring power.
Step 4: Test Heating Elements
What to inspect
Use a multimeter after disconnecting electrical power.
Why it matters
Heating elements wear out over time and are one of the most common failures.
Expected result
Resistance should fall within the manufacturer’s specifications.
What to do next
Replace any element that shows an open circuit or incorrect resistance.
Step 5: Evaluate the Thermostats
What to inspect
Upper and lower thermostats.
Why it matters
Faulty thermostats prevent heating elements from receiving power.
Expected result
Thermostats should switch power properly as temperatures change.
What to do next
Replace defective thermostats before reinstalling access panels.
Step 6: Restore Power and Observe Operation
What to inspect
Normal heating cycle.
Why it matters
Verifies that the repair solved the problem.
Expected result
Water begins heating within the expected time.
What to do next
If the heater still does not operate, more advanced diagnosis may be required.
🛑 Understand common heater problems 👉 Why Is My Water Heater Reset Button Not Working?
Quick Diagnosis Table
The following table summarizes the most common symptoms and the likely causes. Use it as a quick reference before moving on to more detailed repairs.
| Symptom | Possible Cause | Recommended Solution |
|---|---|---|
| No hot water | Tripped circuit breaker | Reset breaker and investigate repeated trips |
| No power to heater | Faulty electrical supply | Test incoming voltage |
| Reset button keeps tripping | Faulty thermostat | Test and replace thermostat if necessary |
| Limited hot water | Failed lower heating element | Test and replace heating element |
| Water never gets hot | Failed upper element or thermostat | Perform electrical diagnosis with a multimeter |
| Burning smell | Loose or damaged wiring | Disconnect power and inspect wiring immediately |
| Breaker trips repeatedly | Shorted heating element | Test elements and replace defective parts |
| Heater works intermittently | Loose electrical connection | Tighten or repair electrical connections |
| Water heats very slowly | Mineral buildup or weak heating element | Inspect and test heating elements |
| Heater completely dead | Electrical issue or failed safety switch | Check power supply, reset switch, and internal components |
How to Fix Each Common Cause
Now that you’ve identified the most likely reason your electric water heater not turning on problem is occurring, it’s time to discuss repairs. Always confirm the cause before replacing any components. Swapping parts without proper diagnosis can waste money and leave the original problem unresolved. If you’re ever unsure about working with high-voltage electrical equipment, stop and contact a licensed electrician or plumber.
Reset a Tripped Circuit Breaker
If the breaker has tripped once, reset it by moving it fully to the OFF position and then back to ON.
Repair steps:
- Turn off appliances that may share nearby circuits.
- Reset the dedicated water heater breaker.
- Wait 30–60 minutes.
- Check whether hot water returns.
If the breaker trips again, do not continue resetting it. Repeated tripping usually indicates a short circuit, damaged wiring, or a faulty heating element.
Reset the High-Limit Switch
If the reset button has tripped, restore power only after determining why it overheated.
Repair steps:
- Turn off the breaker.
- Remove the upper access panel.
- Fold back the insulation carefully.
- Press the red reset button.
- Replace insulation and cover.
- Restore power.
If the reset button trips again within a short period, test the thermostats before using the heater regularly.
Replace a Heating Element
Heating elements are wear items and commonly fail after years of service, especially in areas with hard water.
Basic replacement process:
- Turn off power.
- Shut off the cold-water supply.
- Drain the tank below the faulty element.
- Disconnect element wires.
- Remove the old element with an element wrench.
- Install a new gasket.
- Tighten the replacement element.
- Refill the tank completely.
- Open a hot-water faucet until air is removed.
- Restore electrical power only after the tank is completely full.
Important: Never energize an empty water heater. Dry firing can destroy a brand-new heating element within seconds.
Replace a Faulty Thermostat
If testing confirms a defective thermostat, replacement is usually straightforward.
Steps include:
- Disconnect power.
- Photograph the wiring.
- Remove wires one at a time.
- Install the new thermostat in the same position.
- Reconnect wires exactly as before.
- Set both thermostats to the same temperature, typically around 120°F (49°C) for most households.
Repair Loose Wiring
Loose electrical connections generate heat and may eventually burn terminals.
If you discover:
- Burned insulation
- Melted wire nuts
- Charred terminals
- Damaged connectors
replace the affected components rather than simply tightening them. Extensive wiring damage should be handled by a qualified electrician.
Restore Incoming Power
If voltage is not reaching the water heater:
- Check the disconnect switch.
- Inspect the breaker.
- Look for blown fuses (older homes).
- Verify 240-volt supply with a multimeter.
If proper voltage is missing despite a normal breaker, the problem may lie in the home’s electrical system rather than the water heater itself.
Advanced Troubleshooting
If the basic troubleshooting steps don’t identify the problem, more detailed diagnosis may be necessary. These issues are less common but can still prevent an electric water heater from operating correctly. Because they often involve electrical testing under controlled conditions, they require additional experience and caution.
Sediment Buildup
Mineral deposits settle at the bottom of the tank over time.
Excessive sediment can:
- Reduce heating efficiency.
- Cause overheating.
- Damage heating elements.
- Increase electricity consumption.
Flushing the tank once or twice each year helps reduce sediment accumulation.
Internal Tank Damage
Although a leaking tank doesn’t usually stop electrical operation immediately, severe corrosion can eventually damage internal components.
Warning signs include:
- Rust-colored water
- Water around the base
- Corrosion near fittings
- Persistent leaks
A leaking steel tank cannot be permanently repaired and typically requires replacement.
Failed Temperature Sensors
Some newer electric water heaters use electronic control boards and temperature sensors rather than traditional thermostats.
Symptoms include:
- Error codes
- Flashing status lights
- Heater refusing to operate
- Unpredictable water temperatures
Consult the owner’s manual to interpret diagnostic codes before replacing electronic components.
Damaged Control Board
High-end electric water heaters may include electronic control modules.
Possible causes include:
- Power surges
- Moisture intrusion
- Internal component failure
If the board isn’t sending power to otherwise functional components, replacement is often the only solution.
Voltage Drop
Occasionally, the water heater receives insufficient voltage because of loose electrical connections elsewhere in the circuit.
Symptoms may include:
- Very slow heating
- Intermittent operation
- Heating elements testing good despite poor performance
A licensed electrician can perform voltage-drop testing if this issue is suspected.
🛑 Understand common heater problems 👉 Why Does My Water Heater Take Too Long to Heat?
When Repair Is Not Worth It
Not every water heater should be repaired. In some situations, replacing the unit is the more practical and cost-effective choice. Spending money on multiple repairs for an aging appliance often exceeds the value of installing a newer, more efficient model.
Replacement is often the smarter option if:
- The tank is more than 10–15 years old.
- The steel tank is leaking.
- Multiple major components have failed at once.
- Repair costs approach 50% or more of a new unit’s price.
- Rust is visible inside the tank.
- The heater no longer meets your household’s hot-water demand.
- Replacement parts are discontinued or difficult to obtain.
Modern electric water heaters often provide:
- Improved insulation
- Better energy efficiency
- Faster recovery rates
- Enhanced safety features
- Longer warranties
Preventive Maintenance Tips
Regular maintenance significantly reduces the likelihood of future breakdowns. Most preventive tasks require only a small amount of time each year but can extend the life of your water heater and improve efficiency.
Recommended maintenance includes:
- Flush the tank every 6–12 months.
- Test the temperature and pressure relief valve annually.
- Inspect wiring for signs of overheating.
- Check access panels for moisture.
- Verify thermostat settings remain around 120°F.
- Look for leaks around plumbing connections.
- Remove sediment in hard-water areas more frequently.
- Replace worn heating elements before complete failure.
- Keep the area around the heater clean and dry.
- Schedule professional inspections every few years if the unit is aging.
Preventive maintenance not only improves reliability but can also lower electricity costs by allowing the heater to operate more efficiently.
Common Mistakes to Avoid
Many homeowners unintentionally create bigger problems while attempting simple repairs. Avoiding these mistakes saves time, money, and frustration.
Common mistakes include:
- Resetting the breaker repeatedly without diagnosing the cause.
- Replacing heating elements before testing them.
- Forgetting to disconnect electrical power.
- Turning on the heater before the tank is full.
- Mixing thermostat temperature settings.
- Ignoring small leaks.
- Failing to reinstall insulation behind access panels.
- Using incorrect replacement parts.
- Skipping multimeter testing.
- Assuming every “no hot water” problem is caused by heating elements.
Taking a careful, methodical approach almost always produces better results than replacing parts based on guesswork.
When to Call a Professional
Some repairs involve significant electrical hazards or specialized diagnostic equipment. Recognizing when to stop troubleshooting protects both your safety and your home.
Call a qualified professional if:
- The circuit breaker trips repeatedly after resetting.
- Wiring shows signs of burning or melting.
- You smell burning plastic.
- The tank is leaking.
- Electrical testing indicates abnormal voltage.
- The control board has failed.
- You’re uncomfortable working with 240-volt electrical systems.
- Plumbing modifications are required.
- The heater still doesn’t operate after completing the basic troubleshooting steps.
- Local electrical codes require licensed repairs.
Professional diagnosis is often faster and less expensive than replacing several parts unnecessarily.
Estimated Repair Costs
The table below provides approximate repair costs. Actual prices vary depending on your location, labor rates, and water heater model.
| Repair | Estimated Cost | DIY or Professional |
|---|---|---|
| Reset circuit breaker | $0–$20 | DIY |
| Replace heating element | $25–$100 | DIY or Professional |
| Replace thermostat | $30–$120 | DIY or Professional |
| Replace high-limit switch | $30–$100 | DIY or Professional |
| Repair electrical wiring | $100–$350 | Professional |
| Replace control board | $150–$500 | Professional |
| Replace temperature sensor | $75–$250 | Professional |
| Flush tank | $0–$150 | DIY or Professional |
| Diagnose electrical issue | $100–$250 | Professional |
| Replace entire electric water heater | $900–$2,500+ | Professional |
Final Thoughts
An electric water heater not turning on is often the result of a manageable problem rather than a complete appliance failure. Issues such as a tripped breaker, activated reset button, failed thermostat, or worn heating element account for the majority of service calls and can frequently be identified through a careful, step-by-step troubleshooting process.
Always begin with the simplest checks before replacing parts, and never overlook electrical safety. Disconnect power before opening access panels, verify voltage is absent, and avoid energizing the unit while the tank is empty. These precautions help prevent injury and protect the water heater from further damage.
Routine preventive maintenance—including flushing the tank, inspecting wiring, checking thermostat settings, and addressing small issues early—can significantly extend the life of your water heater while improving efficiency and reducing repair costs. If your troubleshooting points to major electrical faults, repeated breaker trips, or a leaking tank, don’t hesitate to involve a qualified professional. A methodical approach and regular maintenance will keep your water heater operating safely, efficiently, and reliably for years to come.