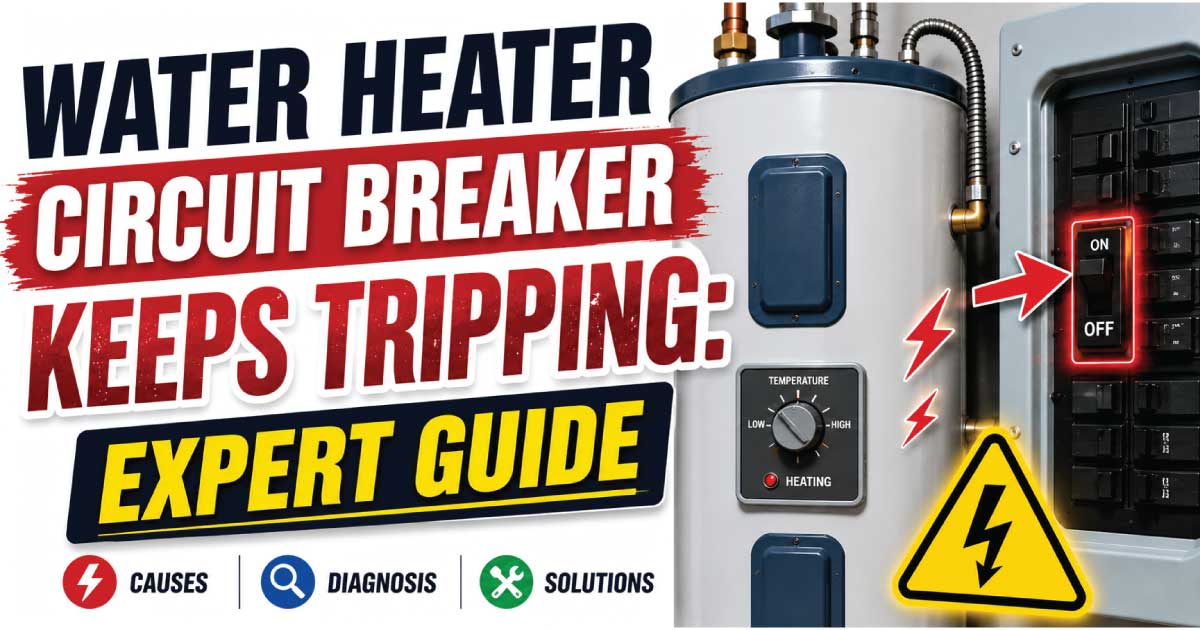
A water heater circuit breaker keeps tripping when the electrical system detects an unsafe condition and automatically cuts power to prevent overheating, electrical damage, or fire. While resetting the breaker may restore power temporarily, repeated tripping is a warning sign that should never be ignored. The problem could be as simple as a worn heating element or as serious as a short circuit inside the water heater or electrical panel.
Many homeowners first notice the issue after running out of hot water or discovering that the breaker has switched to the OFF position. Although it may seem like a minor inconvenience, continuing to reset the breaker without finding the underlying cause can damage the appliance and create a safety hazard.
This guide explains how an electric water heater normally operates, the most common reasons a breaker trips, and the safest way to troubleshoot the problem. You’ll also learn how to recognize warning signs, determine which issues are suitable for DIY repair, and identify situations where calling a qualified electrician or appliance technician is the safest choice.
Common Signs and Symptoms
When a breaker trips repeatedly, the symptoms often reveal valuable clues about the underlying problem. Paying attention to exactly when the breaker trips can help narrow down the cause before you begin troubleshooting. Some failures occur immediately after resetting the breaker, while others appear only after the heater has been running for several minutes.
Common symptoms include:
- Circuit breaker trips immediately after being reset.
- Breaker trips after 10–30 minutes of heating.
- Water heater suddenly stops producing hot water.
- Breaker feels unusually warm or hot.
- Burning smell near the electrical access panel.
- Buzzing or humming sounds from the heater.
- Hot water temperature changes unexpectedly.
- Water leaking around the tank or electrical covers.
- Visible scorch marks near wiring connections.
- Breaker becomes harder to reset over time.
Less common warning signs include:
- Lights dim briefly when the heater starts.
- The breaker trips only during periods of heavy household electrical use.
- Moisture inside the upper or lower electrical compartment.
- Rust around wiring terminals.
Practical example:
If the breaker trips within seconds of turning it on, there is often a direct electrical short or severe wiring problem. If it trips after the heater has been operating for several minutes, a failing heating element or thermostat is usually more likely.
Understanding these patterns saves time during diagnosis and reduces unnecessary part replacements.
How the Appliance or System Normally Works
Understanding how an electric water heater functions makes troubleshooting much easier. The system is relatively simple, and each component has a specific job. When one part fails, it often creates symptoms that point directly toward the faulty component.
A typical electric water heater operates like this:
- Cold water enters the tank.
- A thermostat monitors water temperature.
- When water cools below the set temperature, the thermostat energizes one heating element.
- The element converts electricity into heat.
- Water warms until the thermostat reaches its target temperature.
- Power switches off until more heating is needed.
Most residential electric water heaters use:
- Two thermostats
- Two heating elements
- High-limit safety switch
- Dedicated circuit breaker
- Heavy-gauge electrical wiring
The breaker protects the entire circuit. If excessive current flows because of a short circuit, faulty component, damaged wiring, or electrical overload, it disconnects power almost instantly.
Under normal conditions, the breaker should never trip during everyday operation.
Most Common Reasons This Problem Happens
A circuit breaker is designed to protect your home, not inconvenience you. When it trips repeatedly, there is almost always an electrical fault somewhere in the system. Identifying the most common causes allows homeowners to diagnose the problem methodically instead of replacing parts at random.
Burned-Out Heating Element
The heating element is one of the most common reasons a water heater circuit breaker keeps tripping.
Why it happens
Heating elements operate in water every day. Over time they accumulate mineral deposits, corrode, or develop internal cracks that allow electricity to short to the metal tank.
Symptoms
- Breaker trips while heating
- Little or no hot water
- Water heats slowly
- Heater works briefly before shutting off
How to identify it
- Test the element using a multimeter.
- Look for continuity between the element and the metal tank.
- Inspect for visible corrosion or swelling.
Faulty Thermostat
Thermostats control when heating elements switch on and off.
Why it happens
Age, overheating, or electrical wear can cause thermostat contacts to stick closed, allowing a heating element to remain energized longer than intended.
Symptoms
- Water becomes excessively hot.
- Breaker trips after prolonged heating.
- High-limit reset repeatedly activates.
How to identify it
- Check thermostat continuity.
- Compare thermostat settings.
- Look for burned electrical contacts.
Loose or Damaged Wiring
Electrical connections naturally loosen over many heating and cooling cycles.
Why it happens
Loose terminals increase electrical resistance, producing heat that may eventually trip the breaker.
Symptoms
- Burning smell
- Melted insulation
- Flickering power
- Warm electrical cover
How to identify it
- Turn off power completely.
- Remove access covers.
- Inspect all wire connections carefully.
Never tighten energized wiring.
Short Circuit
A short circuit creates an immediate surge of electrical current.
Why it happens
Damaged insulation, pinched wires, failed heating elements, or internal component failures allow electricity to take an unintended path.
Symptoms
- Breaker trips instantly
- Sparking
- Visible damaged wiring
How to identify it
Immediate breaker trips usually indicate this type of fault and require careful inspection before restoring power.
Water Leaks
Water and electricity are a dangerous combination.
Why it happens
A leaking tank, pipe connection, or pressure relief valve can allow moisture to enter electrical compartments.
Symptoms
- Rust
- Damp insulation
- Corrosion
- Breaker trips after leaks appear
How to identify it
Look carefully around:
- Heating elements
- Electrical covers
- Pipe fittings
- Tank seams
Even a slow drip can eventually cause electrical problems.
Weak or Worn Circuit Breaker
Sometimes the water heater is not the problem.
Why it happens
Circuit breakers wear out after years of operation and repeated tripping.
Symptoms
- Breaker feels loose.
- Trips with no obvious fault.
- Difficult to reset.
- Trips below rated load.
How to identify it
An electrician can measure current draw and verify whether the breaker itself has become defective.
Electrical Overload
Water heaters require significant electrical current.
Why it happens
Although most heaters have dedicated circuits, wiring mistakes or unauthorized additions can overload the breaker.
Symptoms
- Breaker trips only during heavy electrical use.
- Other appliances lose power simultaneously.
How to identify it
Check whether anything else is connected to the water heater circuit.
Safety Precautions Before Troubleshooting
Working around electricity and hot water requires careful preparation. Even a routine inspection can become dangerous if the power is not disconnected properly. Taking a few minutes to follow basic safety procedures greatly reduces the risk of electrical shock, burns, or equipment damage.
Before beginning any inspection:
- Turn OFF the water heater breaker.
- Verify power is off using a non-contact voltage tester.
- Allow hot water inside the tank to cool if possible.
- Wear insulated gloves and safety glasses.
- Keep the area dry.
- Never touch exposed wires.
- Do not work while standing on a wet floor.
- Replace damaged wire insulation immediately.
- Never bypass or oversize a breaker.
- Replace all access covers before restoring power.
Stop troubleshooting immediately if you notice:
- Burning insulation
- Smoke
- Melted wiring
- Arcing
- Water contacting electrical parts
These situations require professional repair before the heater is used again.
Tools Required
Having the correct tools helps you diagnose problems safely without causing additional damage. Most basic inspections require only a few common electrical tools, while more advanced testing may involve specialized equipment.
| Tool | Purpose |
|---|---|
| Non-contact voltage tester | Confirm power is off |
| Digital multimeter | Test voltage, continuity, and resistance |
| Screwdriver set | Remove access panels |
| Nut driver | Remove heating element covers |
| Flashlight | Inspect dark areas |
| Needle-nose pliers | Handle wiring safely |
| Adjustable wrench | Tighten plumbing fittings if needed |
| Camera or phone | Photograph wiring before disconnecting components |
| Safety gloves | Protect hands |
| Safety glasses | Protect eyes during inspection |
Step-by-Step Troubleshooting Guide
A systematic troubleshooting process prevents unnecessary repairs and helps isolate the actual cause. Follow these steps in order instead of jumping directly to replacing parts. Each inspection builds on the previous one and reduces the chance of overlooking a simple issue.
Check the breaker position.
What to inspect: Determine whether the breaker is fully tripped or partially between ON and OFF.
Why it matters: A partially tripped breaker must be reset correctly before testing.
Expected result: Breaker resets firmly.
What to do next: If it trips immediately, continue to the next step.
Inspect for water leaks.
What to inspect: Tank, fittings, pressure relief valve, and electrical access panels.
Why it matters: Moisture can create electrical faults.
Expected result: Dry components.
What to do next: Repair leaks before further electrical testing.
Look for burned wiring.
What to inspect: Wire insulation, terminals, and connectors.
Why it matters: Heat damage often indicates loose connections or excessive current.
Expected result: Clean, undamaged wiring.
What to do next: Replace damaged wiring and tighten loose terminals with the power off.
Test the heating elements.
What to inspect: Upper and lower elements using a multimeter.
Why it matters: Grounded or shorted elements frequently trip breakers.
Expected result: Resistance within manufacturer specifications and no continuity to the tank.
What to do next: Replace any defective element.
Check the thermostats.
What to inspect: Thermostat contacts and high-limit reset button.
Why it matters: Faulty controls may keep elements energized too long.
Expected result: Proper switching and no signs of overheating.
What to do next: Replace malfunctioning thermostats.
Observe when the breaker trips.
What to inspect: Timing after resetting power.
Why it matters: Immediate trips often indicate shorts, while delayed trips suggest heating component issues.
Expected result: Consistent timing pattern.
What to do next: Match the symptom with the diagnosis table below.
🛑 Learn water heater troubleshooting tips 👉 Water Heater Heating Element Failure: Causes & Fixes
Quick Diagnosis Table
This quick-reference table summarizes the most common symptoms and their likely causes. Use it as a starting point before replacing parts, but always confirm the diagnosis with proper testing whenever possible.
| Symptom | Possible Cause | Recommended Solution |
|---|---|---|
| Breaker trips immediately | Short circuit | Inspect wiring and heating elements |
| Breaker trips after several minutes | Faulty heating element | Test and replace element |
| No hot water | Failed heating element or thermostat | Test components with a multimeter |
| Burning smell | Loose wiring | Disconnect power and repair wiring |
| Water around electrical cover | Tank or fitting leak | Repair leak before restoring power |
| Breaker difficult to reset | Worn breaker | Have the breaker tested or replaced |
| Water too hot before tripping | Faulty thermostat | Replace thermostat |
| Breaker trips intermittently | Loose connection or failing breaker | Inspect electrical connections and breaker condition |
How to Fix Each Common Cause
Now that you’ve identified the most likely cause, the next step is making the correct repair. Always confirm the diagnosis before replacing parts. Guessing often leads to unnecessary expenses and doesn’t solve the problem. If you’re uncomfortable working with electrical equipment, stop after the inspection and contact a qualified technician.
Replace a Faulty Heating Element
A grounded or burned-out heating element is one of the most common repairs on electric water heaters.
Safety first: Turn off the circuit breaker, verify there is no voltage at the water heater, and shut off the cold water supply before removing any heating element.
Repair steps:
- Turn off electrical power.
- Shut off the water supply.
- Drain the tank below the faulty element.
- Remove the access cover and insulation.
- Disconnect the wires from the heating element.
- Use a water heater element wrench to remove the old element.
- Install the new gasket and heating element.
- Tighten securely without overtightening.
- Refill the tank completely before restoring power.
- Open a hot water faucet until all air is removed.
- Turn the breaker back on.
Never energize a heating element before the tank is completely full of water. A dry-fired element can fail within seconds.
Replace a Defective Thermostat
A thermostat that sticks closed or fails to regulate temperature can keep the heating element energized long enough to trip the breaker.
Safety first: Confirm power is off using a voltage tester before touching thermostat wiring.
Repair steps:
- Remove the access panel.
- Take a photo of the wiring.
- Disconnect the wires.
- Remove the thermostat from its mounting bracket.
- Install the replacement thermostat.
- Match the temperature setting to the original, typically around 120°F (49°C) for most homes.
- Reconnect the wiring.
- Replace insulation and covers before restoring power.
Using matching replacement parts recommended by the water heater manufacturer helps ensure proper operation.
Repair Loose or Burned Wiring
Loose electrical connections create resistance, producing excessive heat that may trip the breaker.
Safety first: Never tighten live electrical connections.
Repair involves:
- Replacing burned wire ends
- Installing new wire connectors if damaged
- Tightening terminal screws to the manufacturer’s specifications
- Replacing melted insulation
- Inspecting for additional heat damage nearby
If the wire itself has become brittle or blackened, replacing the affected section is usually safer than attempting a repair.
Eliminate Moisture Problems
If water reaches electrical components, simply drying the area is not enough.
First identify the source:
- Leaking pressure relief valve
- Pipe connection leak
- Heating element gasket leak
- Tank corrosion
- Condensation
Repair the leak before replacing any damaged electrical parts. If the steel tank itself is leaking through corrosion, replacement of the entire water heater is usually the only permanent solution.
Replacep a Weak Circuit Breaker
If testing confirms the water heater draws normal current and all internal components are functioning correctly, the breaker itself may be worn out.
Circuit breaker replacement should generally be handled by an electrician because it involves working inside the home’s electrical panel.
Replacing the breaker with a larger one is never an acceptable solution unless the entire circuit has been redesigned according to electrical code requirements.
Advanced Troubleshooting
If the common causes have been ruled out and the water heater circuit breaker keeps tripping, a deeper diagnosis may be necessary. These less common issues often require more experience and specialized testing equipment.
Damaged Supply Wiring
The wiring between the electrical panel and the water heater may have:
- Rodent damage
- Nail or screw punctures
- Heat deterioration
- Cracked insulation
An insulation resistance tester (megohmmeter) is often used by electricians to detect hidden wiring faults that a standard multimeter cannot find.
Internal Short in the Water Heater
Occasionally, electrical components inside the heater develop intermittent faults that only appear as they heat up.
Signs include:
- Breaker trips only after extended operation
- No visible damage
- Components pass basic resistance tests while cold
Professional load testing may be required.
Defective High-Limit Switch
The high-limit switch shuts off power if water becomes dangerously hot.
A failing switch may:
- Trip unexpectedly
- Fail to reset consistently
- Cause intermittent heating
If the high-limit switch repeatedly activates, investigate the thermostat before replacing the switch itself.
Electrical Panel Problems
Although uncommon, issues inside the service panel can contribute to repeated breaker trips.
Examples include:
- Loose breaker connections
- Damaged bus bars
- Corrosion
- Overheating inside the panel
These repairs should only be performed by qualified electricians.
Incorrect Water Heater Size
While this doesn’t directly trip the breaker, homeowners sometimes replace an older water heater with a larger model that exceeds the existing circuit’s capacity.
Always verify:
- Breaker amperage
- Wire size
- Water heater wattage
- Manufacturer electrical requirements
Installing equipment that exceeds the circuit rating creates a continuous overload condition.
🛑 Learn water heater troubleshooting tips 👉 Why Does My Water Heater Circuit Breaker Keep Tripping?
When Repair Is Not Worth It
Not every water heater should be repaired. In some cases, replacing the entire unit saves money and improves reliability.
Replacement is often the better choice when:
- The tank is leaking.
- The unit is more than 10–15 years old.
- Multiple electrical components have failed.
- Repair costs exceed about half the cost of a new unit.
- The tank shows heavy rust or corrosion.
- Replacement parts are difficult to obtain.
- The heater has experienced repeated major failures.
Modern electric water heaters are generally more energy-efficient and often include improved insulation, better controls, and enhanced safety features.
Preventive Maintenance Tips
Most breaker-related problems develop gradually rather than suddenly. Regular maintenance helps identify small issues before they become expensive repairs or safety hazards.
Good preventive maintenance includes:
- Inspect the water heater every six months.
- Check for water leaks around fittings.
- Test the temperature and pressure relief valve annually.
- Flush sediment from the tank once or twice a year, depending on water quality.
- Inspect wiring for discoloration or loose connections.
- Listen for unusual popping or humming sounds.
- Keep the area around the heater clean and dry.
- Verify the thermostat remains set near 120°F (49°C).
- Replace worn insulation around electrical access panels.
- Have older electrical systems inspected periodically.
If your home has hard water, flushing the tank more frequently can significantly extend heating element life.
Common Mistakes to Avoid
Many homeowners accidentally make the problem worse while trying to fix it. Avoiding these common mistakes can prevent equipment damage and reduce safety risks.
Common mistakes include:
- Repeatedly resetting the breaker without diagnosing the cause.
- Replacing parts without testing them first.
- Turning the power on before the tank is full.
- Ignoring small water leaks.
- Installing the wrong replacement heating element.
- Using an oversized circuit breaker.
- Forgetting to replace insulation after repairs.
- Working without verifying power is off.
- Mixing wire connections during thermostat replacement.
- Assuming the breaker is always the problem.
Taking a systematic approach almost always leads to a faster and more accurate repair.
When to Call a Professional
Some water heater problems are beyond the scope of safe DIY repair. Knowing when to stop can prevent serious injury and additional damage.
Contact a qualified electrician or appliance repair technician if:
- The breaker trips immediately after every reset.
- You detect burning smells or smoke.
- Wiring inside the electrical panel appears damaged.
- The tank itself is leaking.
- You are uncomfortable using electrical testing equipment.
- Voltage measurements seem abnormal.
- The breaker continues tripping after replacing failed components.
- The repair requires modifying household wiring.
- Local electrical codes require licensed electrical work.
Professional diagnosis is often less expensive than replacing multiple parts that aren’t actually faulty.
Estimated Repair Costs
The table below provides typical repair cost ranges. Actual pricing depends on your location, water heater model, labor rates, and parts availability.
| Repair | Estimated Cost | DIY or Professional |
|---|---|---|
| Heating element replacement | $25–$75 (parts), $150–$300 installed | DIY or Professional |
| Thermostat replacement | $20–$60 (parts), $120–$250 installed | DIY or Professional |
| Tighten or repair wiring | $0–$30 (minor materials), $100–$250 installed | DIY or Professional |
| Circuit breaker replacement | $150–$350 | Professional |
| Leak repair (fitting or valve) | $20–$150 | DIY or Professional |
| Pressure relief valve replacement | $25–$75 (parts), $150–$300 installed | DIY or Professional |
| Electrical circuit repair | $200–$800 | Professional |
| Complete water heater replacement | $900–$2,500+ | Professional |
Final Thoughts
If your water heater circuit breaker keeps tripping, treat it as an important safety warning rather than a minor inconvenience. The breaker is doing exactly what it was designed to do—protect your home and electrical system from unsafe conditions. While common problems such as a failed heating element, faulty thermostat, loose wiring, or a worn breaker are often repairable, accurately diagnosing the cause before replacing parts is essential.
Begin with simple visual inspections, follow safe troubleshooting procedures, and test components methodically instead of relying on guesswork. Always disconnect power before opening the water heater, and never ignore signs like burning odors, melted wiring, or water around electrical components. Those conditions require immediate attention.
Regular maintenance—including flushing the tank, checking for leaks, inspecting wiring, and monitoring heating performance—can prevent many breaker-related issues before they become costly repairs. By combining safe DIY practices with professional help when needed, you can restore reliable hot water, protect your electrical system, and extend the life of your water heater.