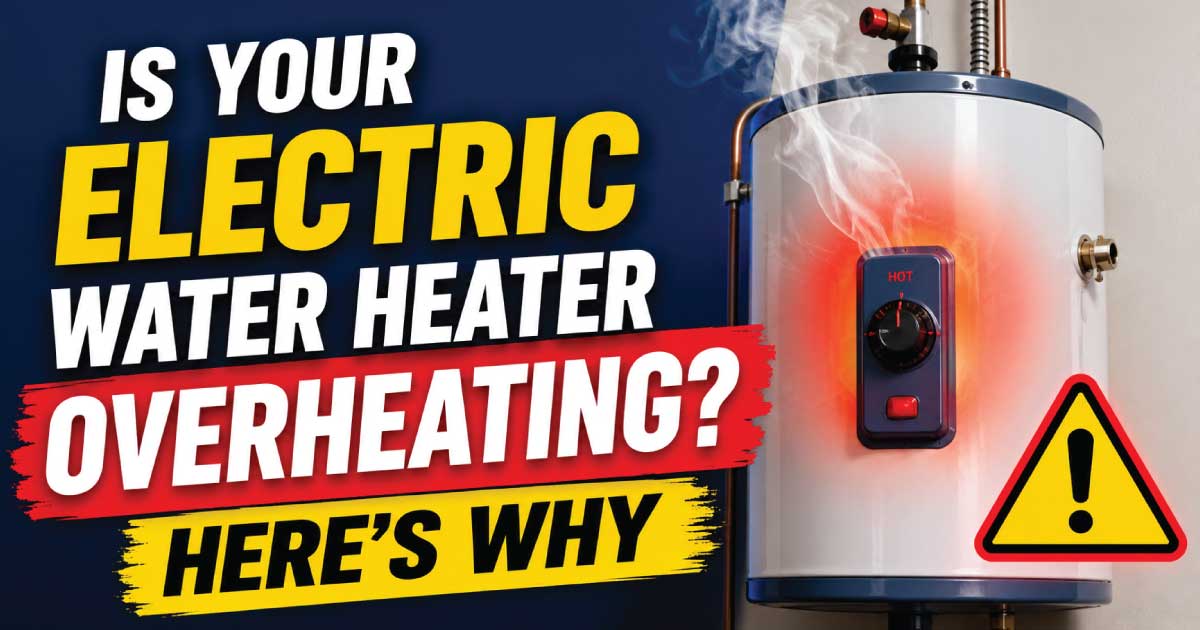
An electric water heater overheating is more than an inconvenience—it can become a serious safety issue if ignored. Water that is excessively hot can cause scalding injuries, increase energy bills, damage plumbing components, and place unnecessary stress on the heater itself. In many cases, the problem starts with a faulty thermostat, heating element, or electrical control, but several other issues can also cause the tank to produce water that is much hotter than expected.
The good news is that many overheating problems can be diagnosed with a careful inspection before expensive repairs become necessary. Understanding how your water heater normally operates makes it much easier to recognize what has gone wrong and determine whether the issue is suitable for a DIY repair or requires a licensed technician.
This guide explains the most common causes of an electric water heater overheating, the warning signs to watch for, essential safety precautions, and a step-by-step troubleshooting process. By the end of this first part, you’ll know how to safely inspect your system, identify likely faults, and narrow down the source of the problem before deciding on the best repair.
Common Signs and Symptoms
An overheating electric water heater often gives several warning signs before a complete failure occurs. Paying attention to these symptoms can help you prevent costly repairs and reduce safety risks. Some signs appear gradually, while others develop suddenly after a component fails.
Common symptoms include:
- Water that is too hot even at normal faucet settings.
- Water temperature changing without adjusting the thermostat.
- Scalding hot water immediately after opening a faucet.
- Hot water running out faster than usual.
- Popping or boiling noises inside the tank.
- Steam coming from hot water fixtures in severe cases.
- The temperature and pressure (T&P) relief valve dripping or releasing water.
- High electricity bills without increased water usage.
- Plastic plumbing fittings becoming unusually warm.
- Burn marks or overheating smells near the electrical access panels.
A homeowner may first notice the issue while showering. For example, if the shower suddenly becomes painfully hot even though the mixing valve has not moved, the thermostat may no longer be regulating the heating element correctly.
If several fixtures throughout the home produce excessively hot water, the problem is usually inside the water heater rather than at an individual faucet.
How the Appliance or System Normally Works
Before troubleshooting, it helps to understand how an electric water heater is designed to heat water safely. Knowing what normal operation looks like makes it easier to recognize which component may have failed.
A standard electric storage water heater contains:
- An insulated storage tank.
- An upper heating element.
- A lower heating element.
- Upper and lower thermostats.
- High-temperature safety reset switch.
- Temperature and pressure relief valve.
- Electrical wiring and power supply.
The heating process normally works like this:
- Cold water enters the bottom of the tank.
- The thermostat senses the water temperature.
- When the temperature falls below the thermostat setting, it energizes one heating element.
- The water heats gradually.
- Once the desired temperature is reached, the thermostat shuts off power to the heating element.
- The cycle repeats only when needed.
Most residential electric water heaters are factory-set around 120°F (49°C), which provides comfortable hot water while reducing scalding risks and energy consumption.
If any control fails and continues supplying electricity to a heating element, the water temperature can climb far beyond the intended setting.
Most Common Reasons This Problem Happens
Many overheating problems have similar symptoms, but each has its own cause and repair method. Careful diagnosis helps avoid replacing parts unnecessarily and reduces repair costs.
Faulty Thermostat
The thermostat is the most common reason an electric water heater overheats because it controls when each heating element turns on and off.
Why it happens:
- Internal contacts weld together.
- Age-related wear.
- Electrical arcing.
- Moisture damage.
Symptoms:
- Water becomes much hotter than the temperature setting.
- Consistent overheating after every heating cycle.
- Reset button may occasionally trip.
How to identify it:
- Compare actual water temperature with the thermostat setting.
- Inspect for visible heat damage after disconnecting power.
- Test thermostat continuity with a multimeter if you have electrical testing experience.
Heating Element Stuck On
A damaged heating element may continue heating even when the thermostat attempts to switch it off.
Why it happens:
- Internal short circuit.
- Mineral buildup causing overheating.
- Electrical failure inside the element.
Symptoms:
- Extremely hot water.
- Continuous electrical heating.
- Higher power consumption.
How to identify it:
- Measure element resistance.
- Look for grounded elements.
- Check whether power remains on when it should be off.
Incorrect Thermostat Setting
Sometimes the heater is functioning correctly, but someone has accidentally increased the thermostat setting.
Why it happens:
- Recent maintenance.
- Accidental adjustment.
- Previous homeowner changed settings.
Symptoms:
- Consistently hot water without other signs of malfunction.
How to identify it:
- Remove the access panel.
- Compare the thermostat setting with the recommended temperature.
High-Limit Switch Problems
The high-limit switch is a built-in safety device designed to disconnect power if temperatures become dangerously high.
Why it happens:
- Internal failure.
- Wiring issues.
- Previous overheating damage.
Symptoms:
- Frequent reset trips.
- Water temperature fluctuates.
- Heater occasionally shuts off completely.
How to identify it:
- Check whether the reset button has tripped.
- Inspect for signs of overheating around the control assembly.
Loose or Damaged Wiring
Electrical connections can loosen over time because of repeated heating and cooling cycles.
Why it happens:
- Vibration.
- Corrosion.
- Improper installation.
- Aging electrical terminals.
Symptoms:
- Burn marks.
- Electrical smell.
- Intermittent overheating.
- Tripped breakers.
How to identify it:
- Turn off power.
- Remove access covers.
- Inspect wiring for discoloration or melted insulation.
Sediment Buildup Inside the Tank
Hard water minerals settle at the bottom of the tank and reduce efficient heat transfer.
Why it happens:
- Years without flushing.
- Hard water conditions.
Symptoms:
- Rumbling noises.
- Reduced efficiency.
- Longer heating cycles.
- Localized overheating around the lower element.
How to identify it:
- Listen for popping sounds.
- Review maintenance history.
- Drain a small amount of water and check for sediment.
Temperature and Pressure Relief Valve Issues
The T&P relief valve is a critical safety device rather than the cause of overheating, but its condition often reveals an overheating problem.
Why it happens:
- Excessive tank pressure.
- Extremely hot water.
- Valve wear.
Symptoms:
- Water dripping from the discharge pipe.
- Periodic water release.
How to identify it:
- Inspect the discharge pipe.
- Check whether water temperature is unusually high.
Safety Precautions Before Troubleshooting
Working around an electric water heater involves electricity, pressurized hot water, and high temperatures. Following proper safety procedures greatly reduces the chance of injury or equipment damage. Never rush into disassembly before making the area safe.
Before beginning any inspection:
- Turn off power at the circuit breaker.
- Confirm power is off using a non-contact voltage tester.
- Allow very hot water to cool before draining the tank.
- Wear insulated gloves when working near electrical components.
- Use safety glasses during inspection.
- Never remove electrical covers with power connected.
- Avoid standing in water while working.
- Keep children and pets away from the work area.
- Never plug or cap the T&P relief valve.
- If you smell burning insulation or see melted wiring, stop troubleshooting immediately.
- If the tank appears swollen, leaking heavily, or releasing steam, do not continue using the heater.
DIY troubleshooting is generally limited to inspections, testing, thermostat adjustments, and basic maintenance. Repairs involving internal wiring, replacement of electrical controls, or uncertain electrical faults should be handled by a qualified professional.
Tools Required
Selecting the right tools makes troubleshooting safer and more accurate. Most homeowners already own many of these basic items.
| Tool | Purpose |
|---|---|
| Screwdriver set | Remove access panels |
| Non-contact voltage tester | Verify electrical power is off |
| Digital multimeter | Test voltage, continuity, and resistance |
| Adjustable wrench | Remove fittings if needed |
| Flashlight | Inspect dark areas around the heater |
| Work gloves | Protect hands from hot surfaces |
| Safety glasses | Protect eyes during inspection |
| Infrared thermometer | Measure outlet water temperature |
| Garden hose | Drain tank during maintenance |
| Towels or bucket | Catch small water spills |
Step-by-Step Troubleshooting Guide
A systematic troubleshooting process prevents unnecessary repairs and helps isolate the actual cause of overheating. Complete each step in order before replacing any components.
Step 1: Confirm the Water Is Actually Overheating
Inspect:
Measure hot water temperature using a cooking or infrared thermometer.
Why it matters:
Some homeowners mistake normal hot water for overheating.
Expected result:
Water should be close to the thermostat setting, typically around 120°F.
Next step:
If the temperature is much higher, continue troubleshooting.
Step 2: Check the Thermostat Setting
Inspect:
Remove the access cover after disconnecting power.
Why it matters:
Incorrect settings are one of the easiest problems to correct.
Expected result:
Thermostat should be set near the recommended temperature.
Next step:
If correctly adjusted, inspect the thermostat itself.
Step 3: Look for Tripped Safety Controls
Inspect:
Press the high-temperature reset button only after determining why it may have tripped.
Why it matters:
Repeated trips indicate an underlying fault rather than a one-time event.
Expected result:
The reset should remain engaged.
Next step:
If it trips again, further diagnosis is needed.
Step 4: Inspect Wiring
Inspect:
Check electrical terminals, connectors, and insulation.
Why it matters:
Loose wiring can cause overheating, poor control, and electrical hazards.
Expected result:
Connections should appear tight and free of burn marks.
Next step:
If damage is found, discontinue DIY repairs until wiring is corrected.
Step 5: Listen for Tank Noises
Inspect:
Operate hot water and listen while the heater is running.
Why it matters:
Popping sounds often indicate sediment accumulation.
Expected result:
Heating should be relatively quiet.
Next step:
If heavy sediment is suspected, plan for a tank flush after confirming the heater is safe.
Step 6: Inspect the T&P Relief Valve Area
Inspect:
Look for moisture around the discharge pipe.
Why it matters:
Water discharge can indicate excessive pressure or overheating.
Expected result:
The area should remain dry during normal operation.
Next step:
If water continues dripping, determine whether overheating or excessive pressure is responsible before replacing the valve.
Quick Diagnosis Table
| Symptom | Possible Cause | Recommended Solution |
|---|---|---|
| Water is dangerously hot | Faulty thermostat | Test and replace thermostat if defective |
| Water hotter than thermostat setting | Thermostat out of calibration | Inspect and replace thermostat |
| Reset button keeps tripping | High-limit switch reacting to overheating | Diagnose thermostat and heating elements |
| Popping noises | Sediment buildup | Flush the water heater |
| Burn smell near access panel | Loose or damaged wiring | Disconnect power and inspect wiring professionally |
| High electricity bills | Heating element stuck on | Test heating element and replace if faulty |
| Water dripping from T&P valve | Overheating or excessive pressure | Diagnose overheating before replacing valve |
| Water temperature constantly changes | Thermostat or electrical control issue | Test thermostats and inspect electrical components |
How to Fix Each Common Cause
Now that you’ve narrowed down the likely cause of an electric water heater overheating, the next step is making the appropriate repair. Some repairs are well within the abilities of a careful homeowner, while others involve live electrical circuits and should be left to a qualified technician. Always disconnect power at the circuit breaker and verify it is off before removing any covers or touching internal components.
Replace a Faulty Thermostat
A defective thermostat is one of the most common causes of overheating because it no longer stops the heating element at the correct temperature.
How to repair it:
- Turn off the circuit breaker.
- Confirm power is off with a non-contact voltage tester.
- Remove the insulation covering the thermostat.
- Take a photo of the wiring before disconnecting anything.
- Remove the old thermostat.
- Install the replacement thermostat designed for your water heater model.
- Reconnect the wires securely.
- Set both thermostats to the same temperature, typically 120°F (49°C).
- Restore power and monitor water temperature over the next heating cycle.
DIY or professional?
DIY is reasonable if you’re comfortable replacing electrical components and following the manufacturer’s instructions. If wiring is damaged or confusing, hire a professional.
Replace a Failed Heating Element
A heating element that has shorted internally or become grounded can continue heating unexpectedly or operate inefficiently.
How to repair it:
- Turn off electrical power.
- Shut off the cold water supply.
- Drain enough water below the failed element.
- Disconnect the wiring.
- Remove the heating element using the proper element wrench.
- Install a new gasket and replacement element.
- Tighten securely without overtightening.
- Refill the tank completely before restoring power.
- Open a hot water faucet to remove trapped air.
Important: Never energize an empty tank. Dry-firing a heating element can destroy it within seconds.
🛑 Find effective water heater fixes 👉 Why Does My Water Heater Breaker Keep Tripping?
Correct Incorrect Thermostat Settings
Sometimes the repair is surprisingly simple.
If someone increased the thermostat setting:
- Lower both thermostats to approximately 120°F.
- Wait several hours for the tank to stabilize.
- Measure the hot water temperature again.
- Adjust only if necessary.
This setting provides comfortable hot water while helping reduce scalding risks and energy use.
Repair Loose or Burned Wiring
Loose electrical connections create heat, increase resistance, and may interfere with thermostat operation.
Repair includes:
- Replacing damaged wire terminals.
- Tightening manufacturer-approved connections.
- Replacing burned wire sections.
- Inspecting for heat damage to nearby controls.
If insulation has melted or terminals are badly charred, replacing only the wire may not be enough. Damaged thermostats or heating elements should also be inspected.
Flush Sediment from the Tank
Mineral buildup causes localized overheating around the lower heating element.
Basic flushing procedure:
- Turn off power.
- Close the cold water supply valve.
- Attach a garden hose to the drain valve.
- Direct water to a safe drain.
- Open a nearby hot water faucet.
- Drain the tank completely.
- Briefly reopen the cold water supply to stir remaining sediment.
- Continue flushing until water runs clear.
- Close the drain valve.
- Refill the tank before restoring power.
Homes with hard water may benefit from flushing once or twice each year.
Replace a Defective T&P Relief Valve
Only replace the temperature and pressure relief valve after confirming it is actually faulty.
If overheating caused the valve to open, replacing the valve alone will not solve the underlying problem.
A new valve should:
- Match the original pressure rating.
- Match the original temperature rating.
- Be installed with approved pipe sealant.
- Include a properly installed discharge pipe.
Advanced Troubleshooting
If the basic inspections do not reveal the problem, more detailed diagnosis may be necessary. These less common failures often require electrical testing or experience interpreting symptoms.
Check for a Grounded Heating Element
A grounded heating element can continue heating even when the thermostat is off.
Signs include:
- Water hotter than the thermostat setting.
- High energy consumption.
- Heater operating unexpectedly.
Testing requires a multimeter to measure continuity between the heating element terminals and the tank.
Test Thermostat Switching
Each thermostat should energize only one heating element at the appropriate time.
If both elements appear energized simultaneously, possible causes include:
- Incorrect wiring
- Failed thermostat
- Control malfunction
Electrical testing under load should only be performed by someone familiar with safe electrical practices.
Inspect for Internal Tank Damage
Although uncommon, internal tank problems can affect temperature regulation.
Watch for:
- Rust-colored water
- Water leaks around seams
- Bulging tank surfaces
- Excessive corrosion
These symptoms often indicate the heater is approaching the end of its service life.
Examine the Electrical Supply
Improper voltage is less common but worth checking if other electrical issues exist in the home.
Potential problems include:
- Loose breaker connections
- Damaged wiring
- Incorrect circuit installation
- Shared circuits causing intermittent operation
A licensed electrician should evaluate supply issues.
When Repair Is Not Worth It
Repairing every overheating water heater is not always the most practical decision. Age, repair costs, and overall condition should all be considered before investing in new parts.
Replacement is often the better choice when:
- The tank is leaking.
- The heater is more than 10–15 years old.
- Multiple major components have failed.
- Severe internal corrosion is present.
- Repair costs approach half the price of a replacement unit.
- Replacement parts are difficult to obtain.
- The tank has repeatedly overheated due to extensive damage.
Installing a new, energy-efficient water heater may reduce electricity consumption while providing improved safety features and better temperature control.
🛑 Find effective water heater fixes 👉 What Causes a Water Heater Thermostat to Fail?
Preventive Maintenance Tips
Regular maintenance is the best way to reduce the risk of an electric water heater overheating. Most tasks require only a small amount of time but can significantly extend the appliance’s lifespan.
Helpful maintenance practices include:
- Flush the tank annually to remove sediment.
- Test the T&P relief valve periodically according to the manufacturer’s recommendations.
- Keep the thermostat set near 120°F unless higher temperatures are specifically required.
- Inspect access panels for signs of moisture or overheating.
- Tighten electrical connections if recommended during professional servicing.
- Replace worn heating elements before complete failure.
- Check for plumbing leaks around fittings.
- Inspect the anode rod every few years if your model allows.
- Keep the area around the heater clean and dry.
- Schedule professional inspections if the heater is older or heavily used.
Preventive maintenance costs far less than emergency repairs and helps maintain consistent water temperature.
Common Mistakes to Avoid
Many overheating problems become worse because of avoidable mistakes during diagnosis or repair.
Common homeowner errors include:
- Working without disconnecting electrical power.
- Replacing parts before identifying the actual cause.
- Setting the thermostat excessively high.
- Ignoring repeated high-limit switch trips.
- Forgetting to refill the tank before restoring power.
- Reusing damaged heating element gaskets.
- Assuming a leaking T&P valve is always defective.
- Skipping annual tank flushing.
- Mixing thermostat settings so the upper and lower controls are set differently.
- Continuing to operate a leaking water heater.
Taking a methodical approach usually saves both time and money.
When to Call a Professional
Some overheating issues involve hazards that should not be handled without proper training. Knowing when to stop troubleshooting is an important part of safe appliance repair.
Call a professional if:
- The circuit breaker repeatedly trips.
- Wiring is burned or melted.
- The tank is leaking from the body rather than a fitting.
- Steam is escaping from plumbing fixtures.
- The T&P valve continues discharging after temperature issues have been addressed.
- Electrical testing indicates complex control failures.
- You are uncomfortable working around household electricity.
- The heater still overheats after replacing the thermostat.
- Multiple components have failed simultaneously.
Professional diagnosis may prevent further damage and ensure the repair complies with local electrical and plumbing codes.
Estimated Repair Costs
| Repair | Estimated Cost | DIY or Professional |
|---|---|---|
| Adjust thermostat | $0–$20 | DIY |
| Replace thermostat | $30–$150 | DIY or Professional |
| Replace heating element | $40–$200 | DIY or Professional |
| Flush sediment from tank | $0–$150 | DIY or Professional |
| Replace T&P relief valve | $50–$250 | DIY or Professional |
| Repair electrical wiring | $100–$400 | Professional |
| Replace high-limit switch | $75–$250 | Professional |
| Install new electric water heater | $900–$2,500+ | Professional |
Actual costs vary depending on heater size, location, labor rates, and the specific replacement parts required.
Final Thoughts
An electric water heater overheating is a problem that should never be ignored. While a simple thermostat adjustment may solve some cases, persistent overheating often points to a faulty thermostat, damaged heating element, wiring issue, or excessive sediment inside the tank. Recognizing the warning signs early can help prevent scalding injuries, reduce energy waste, and avoid more expensive repairs.
The safest approach is to begin with basic inspections, follow a logical troubleshooting process, and never work on the heater without disconnecting electrical power first. Routine maintenance—such as flushing the tank, checking temperature settings, and inspecting visible components—can prevent many common failures before they become serious.
If troubleshooting reveals damaged wiring, repeated high-limit switch trips, tank leaks, or other complex electrical faults, professional repair is the safest option. By combining regular preventive maintenance with prompt attention to warning signs, homeowners can keep their electric water heaters operating efficiently, safely, and reliably for many years.