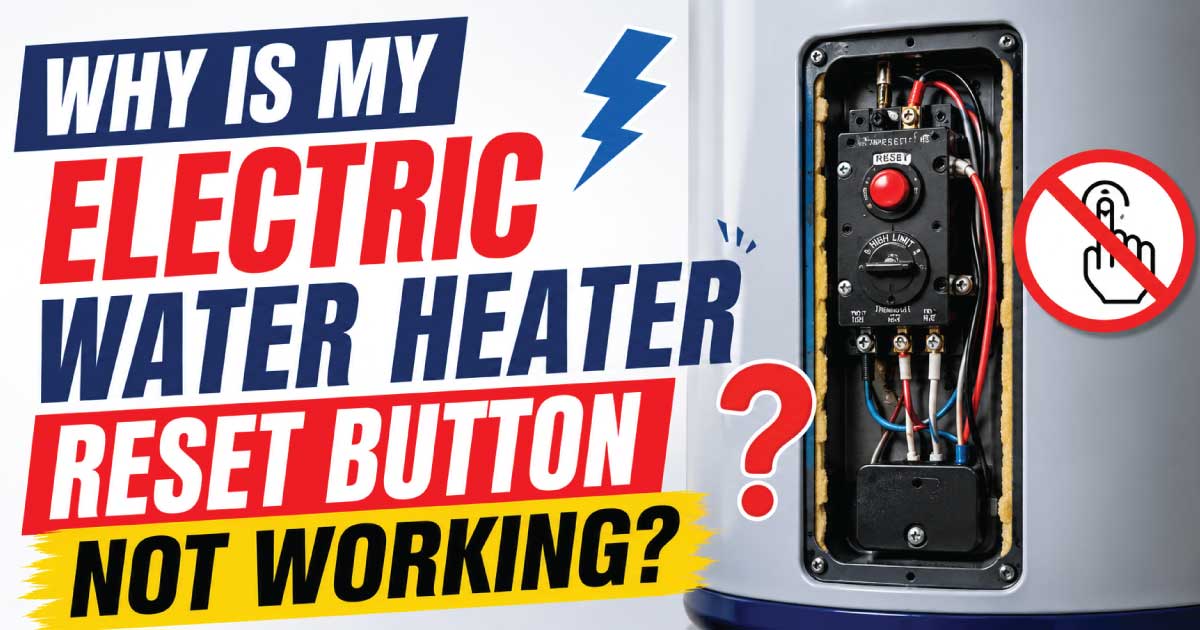
If your electric water heater reset button not working issue has left you without hot water, you’re not alone. This is one of the most common problems homeowners encounter with electric water heaters. The reset button is designed to protect the unit by shutting off power when it detects unsafe operating conditions, but when pressing it doesn’t restore normal operation, the underlying problem usually goes deeper than a simple reset.
Ignoring the issue can lead to repeated loss of hot water, higher electricity bills, damaged heating elements, or even electrical hazards if the real cause remains unresolved. Fortunately, many reset button problems can be diagnosed with careful inspection before deciding whether professional repair is necessary.
In this guide, you’ll learn how an electric water heater normally operates, the most common reasons the reset button fails to solve the problem, how to troubleshoot the system safely, and which warning signs indicate a more serious electrical issue. Whether you’re a first-time homeowner or someone comfortable with basic DIY appliance repair, this step-by-step guide will help you identify the problem safely and efficiently.
Common Signs and Symptoms
When an electric water heater develops reset button problems, it rarely happens without warning. Recognizing the symptoms early helps narrow down the cause and prevents unnecessary replacement of working parts. Some signs point toward a simple thermostat issue, while others indicate electrical faults that require immediate attention.
Common symptoms include:
- No hot water at all.
- Water becomes lukewarm instead of fully hot.
- Reset button clicks but the heater still doesn’t operate.
- Reset button will not stay pressed.
- Reset button repeatedly trips every few hours or days.
- Circuit breaker trips along with the reset button.
- Hot water suddenly stops during normal use.
- Burning smell near the access panel.
- Buzzing or humming sounds from the heater.
- Water temperature fluctuates without adjusting the thermostat.
Less common symptoms include:
- Only a small amount of hot water before it turns cold.
- One heating element working while the other has failed.
- Intermittent operation after pressing the reset button.
- Visible scorch marks around wiring connections.
- Rust or moisture near electrical components.
For example, if your water heater works normally for a day after pressing the reset button but trips again the next morning, the high-limit switch is likely responding to overheating rather than failing on its own. Simply pressing the button again won’t solve the underlying problem.
Understanding these symptoms makes the troubleshooting process much more accurate and prevents replacing parts that are still functioning correctly.
How the Appliance or System Normally Works
Before diagnosing why the reset button isn’t working, it’s helpful to understand what it’s actually protecting. Knowing the normal operating sequence makes it much easier to identify where the failure occurs.
A typical electric water heater includes several key components working together:
- Upper thermostat
- Lower thermostat
- Upper heating element
- Lower heating element
- High-limit safety switch (reset button)
- Electrical wiring
- Insulated storage tank
Here’s how the system normally operates:
- Cold water enters the bottom of the tank.
- The upper thermostat monitors water temperature.
- The upper heating element heats the upper portion first.
- Once the top reaches the target temperature, power transfers to the lower thermostat.
- The lower heating element heats the remaining water.
- When both sections reach the selected temperature, power shuts off until more heating is needed.
The reset button is actually part of the high-limit safety switch. Its job is not to restart the heater after ordinary operation. Instead, it disconnects electrical power whenever water temperature rises to an unsafe level, usually around 170°F (77°C).
When everything functions properly, homeowners rarely need to press the reset button. If it trips once, it may have prevented overheating. If it trips repeatedly, another component is almost always causing the problem.
Most Common Reasons This Problem Happens
Although many homeowners assume the reset button itself has failed, that’s actually one of the least common causes. In most cases, the button is doing exactly what it was designed to do by shutting off the heater before damage occurs.
Faulty Thermostat
A defective thermostat is one of the leading causes of repeated reset button trips because it may fail to shut off power after the water reaches the desired temperature.
Why it happens:
- Internal contacts wear out.
- Electrical components fail with age.
- Temperature calibration drifts over time.
Symptoms:
- Water is unusually hot.
- Reset button trips frequently.
- Inconsistent water temperatures.
How to identify it:
- Compare thermostat settings to actual water temperature.
- Look for signs of overheating around the thermostat.
- Test continuity with a multimeter after disconnecting power.
Burned-Out Heating Element
Heating elements naturally wear out after years of heating water. A damaged element can short internally, causing overheating or electrical faults.
Why it happens:
- Mineral buildup.
- Age-related deterioration.
- Dry firing after the tank was emptied.
- Internal electrical short.
Symptoms:
- Limited hot water.
- Breaker or reset button trips.
- Heater runs longer than normal.
How to identify it:
- Measure resistance with a multimeter.
- Inspect for swelling, corrosion, or burn marks.
- Check for continuity to ground.
Loose or Damaged Wiring
Electrical connections expand and contract during heating cycles. Over time, screws loosen and connections may overheat.
Why it happens:
- Vibration.
- Thermal expansion.
- Poor original installation.
- Corrosion.
Symptoms:
- Burning odor.
- Intermittent operation.
- Discolored wiring.
- Buzzing sounds.
How to identify it:
- Turn off power first.
- Remove access panels.
- Inspect terminals for discoloration or melted insulation.
High-Limit Switch Failure
Although less common, the reset switch itself can eventually wear out.
Why it happens:
- Repeated overheating events.
- Internal mechanical wear.
- Electrical fatigue.
Symptoms:
- Reset button won’t click.
- Heater remains off despite proper voltage.
- No visible thermostat problems.
How to identify it:
- Check continuity across the high-limit switch.
- Confirm thermostats are functioning normally before replacing it.
Tripped Circuit Breaker
Sometimes the water heater isn’t receiving power at all, making the reset button appear ineffective.
Why it happens:
- Electrical overload.
- Short circuit.
- Weak breaker.
Symptoms:
- Completely cold water.
- Reset button has no effect.
- Breaker handle sits midway between ON and OFF.
How to identify it:
- Inspect the electrical panel.
- Fully reset the breaker by switching it OFF before turning it ON.
Sediment Buildup Causing Overheating
Hard water gradually leaves mineral deposits at the bottom of the tank, reducing heating efficiency.
Why it happens:
- High mineral content.
- Lack of maintenance.
- Years of sediment accumulation.
Symptoms:
- Rumbling sounds.
- Reduced hot water supply.
- Longer heating cycles.
How to identify it:
- Listen for popping noises.
- Consider the heater’s maintenance history.
- Inspect drained water for sediment.
Safety Precautions Before Troubleshooting
Working on an electric water heater involves both electricity and hot water. Taking a few minutes to prepare safely greatly reduces the risk of injury and prevents accidental damage to the appliance.
Before opening any access panel or touching electrical components, follow these precautions carefully.
Always:
- Turn off the water heater breaker at the main electrical panel.
- Verify power is off using a non-contact voltage tester.
- Allow the tank to cool if overheating is suspected.
- Wear insulated gloves and safety glasses.
- Keep the work area dry.
- Use insulated tools whenever possible.
- Read the manufacturer’s service information if available.
Avoid:
- Working on energized wiring.
- Touching exposed terminals.
- Resetting the button repeatedly without diagnosis.
- Bypassing safety switches.
- Operating the heater with exposed wiring.
- Draining hot water without protective equipment.
If you notice melted insulation, smoke, burning odors, or evidence of electrical arcing, stop troubleshooting immediately. These conditions often indicate serious electrical damage that should be inspected by a qualified technician.
Tools Required
Gathering the right tools before beginning saves time and allows you to perform a thorough inspection without unnecessary interruptions.
| Tool | Purpose |
|---|---|
| Phillips screwdriver | Remove access panels |
| Flat-head screwdriver | Adjust thermostat settings |
| Non-contact voltage tester | Confirm power is off |
| Digital multimeter | Test voltage, resistance, and continuity |
| Needle-nose pliers | Handle electrical connectors |
| Flashlight | Inspect inside access compartments |
| Work gloves | Protect hands from sharp edges and heat |
| Safety glasses | Protect eyes during inspection |
| Adjustable wrench | Remove access fittings if needed |
| Towel or small bucket | Catch any minor water leaks during inspection |
Step-by-Step Troubleshooting Guide
A logical troubleshooting process helps identify the actual fault instead of replacing parts based on guesswork. Start with the easiest inspections before moving to electrical testing. This approach reduces unnecessary repairs and improves the chances of finding the root cause.
1. Check the circuit breaker
- What to inspect: Locate the dedicated double-pole breaker for the water heater and confirm it is fully in the ON position.
- Why it matters: A partially tripped breaker can cut power to the heater, making the reset button appear ineffective.
- Expected result: The breaker remains on without immediately tripping again.
- What to do next: If it trips repeatedly, stop troubleshooting and investigate for an electrical fault before restoring power.
2. Test for incoming power
- What to inspect: After verifying safe conditions and restoring power only for testing if appropriate, confirm the heater is receiving the correct voltage with a multimeter.
- Why it matters: Without the proper supply voltage, the heater cannot operate regardless of the reset button’s condition.
- Expected result: The measured voltage matches the heater’s rated supply.
- What to do next: If voltage is missing or incorrect, inspect the breaker, wiring, or supply circuit before focusing on internal components.
3. Inspect the reset button and thermostats
- What to inspect: Remove the access panel and insulation to examine the high-limit switch and thermostat assembly for signs of heat damage, loose connections, or corrosion.
- Why it matters: Physical damage often provides an early clue to overheating or component failure.
- Expected result: Components appear clean, secure, and free from discoloration.
- What to do next: If everything looks normal, continue with electrical testing of the thermostats and heating elements rather than replacing parts based on appearance alone.
Quick Diagnosis Table
This table provides a fast reference for matching common symptoms with likely causes. While it simplifies the diagnosis process, always confirm the fault with proper inspection before replacing components.
| Symptom | Possible Cause | Recommended Solution |
|---|---|---|
| No hot water | Tripped breaker or failed heating element | Restore power and test the heating elements |
| Reset button won’t stay in | Faulty thermostat or overheating | Test thermostats and inspect for overheating |
| Reset button clicks but heater stays off | Failed high-limit switch or no incoming power | Verify voltage and test the safety switch |
| Water too hot | Thermostat stuck closed | Replace the defective thermostat |
| Breaker trips repeatedly | Shorted heating element or wiring fault | Test the element for a short and inspect wiring |
| Burning smell | Loose electrical connection | Disconnect power immediately and inspect all terminals |
| Lukewarm water | Failed lower heating element | Test and replace the lower element if defective |
| Frequent reset trips | Overheating, thermostat failure, or sediment buildup | Diagnose the overheating source before resetting again |
How to Fix Each Common Cause
Once you’ve identified the likely reason your electric water heater reset button not working problem occurs, the next step is choosing the correct repair. Avoid replacing multiple parts at once. Confirm the failed component first, then repair only what is necessary. This saves money and reduces the chance of introducing new problems.
Replace a Faulty Thermostat
A malfunctioning thermostat is one of the most common causes of repeated reset button trips because it can continue sending power to the heating element after the water has reached the desired temperature.
Safety first: Turn off the circuit breaker and verify the heater has no power with a non-contact voltage tester before removing any wires.
Repair steps:
- Remove the thermostat access panel.
- Pull back the insulation and protective cover.
- Take a photo of the wiring for reference.
- Disconnect the wires from the thermostat.
- Remove the old thermostat from its retaining bracket.
- Install the new thermostat in the same position so it sits firmly against the tank.
- Reconnect the wires exactly as they were.
- Set both thermostats to the same temperature, typically 120°F (49°C) for most households.
- Replace the insulation and access cover before restoring power.
Tip: Replacing only one thermostat when both are the same age is acceptable if testing confirms the other one is operating correctly.
Replace a Burned-Out Heating Element
Heating elements eventually fail due to age, mineral buildup, or operating without sufficient water in the tank.
Safety first: Turn off power and close the cold-water supply valve before draining the tank below the level of the element.
Repair steps:
- Attach a garden hose to the drain valve.
- Drain enough water to expose the faulty element.
- Disconnect the wiring.
- Remove the old element using a heating element wrench.
- Install a new gasket with the replacement element.
- Tighten securely without over-tightening.
- Refill the tank completely before restoring power.
Important: Never energize an electric water heater with an empty tank. Dry firing can destroy a new heating element within seconds.
Repair Loose or Damaged Wiring
Loose electrical connections create resistance, producing excess heat that may trip the high-limit switch.
Safety first: Confirm power is disconnected before touching any electrical terminals.
Repair includes:
- Tightening loose terminal screws.
- Replacing burned wire connectors.
- Removing damaged wire sections.
- Installing new wire if insulation has melted.
- Checking all terminal screws for secure contact.
If wires show extensive heat damage or melted insulation inside the electrical compartment, replacing only the wire may not solve the underlying issue. Inspect nearby components for additional damage.
Replace the High-Limit Switch
If testing confirms the reset button mechanism has failed internally, replacing the high-limit switch usually restores normal operation.
Replacement involves:
- Disconnect power.
- Label all wires.
- Remove the defective switch.
- Install the matching replacement part.
- Reconnect wiring.
- Reassemble the access panel.
- Restore power and monitor operation.
Never bypass or permanently jumper the high-limit switch. It is a critical safety device that prevents dangerous overheating.
Flush Sediment from the Tank
Sediment buildup reduces heating efficiency and can contribute to overheating.
A basic flush includes:
- Turn off power.
- Shut off the incoming water supply.
- Connect a hose to the drain valve.
- Drain the tank.
- Briefly open the cold-water valve several times to stir and flush remaining sediment.
- Continue until the water runs clear.
- Close the drain valve.
- Refill the tank completely.
- Restore electrical power.
Homes with hard water often benefit from flushing the tank once each year.
🛑 Understand common heater problems 👉 What Causes a Water Heater to Stop Heating Water?
Advanced Troubleshooting
If the basic inspections don’t reveal the problem, more detailed diagnosis may be necessary. These issues occur less frequently but can prevent the reset button from restoring normal operation.
Test Heating Elements with a Multimeter
A visual inspection isn’t always enough. Heating elements can fail internally while appearing normal.
Check for:
- Proper resistance.
- Continuity.
- Short circuit to the metal tank.
An element showing continuity to ground should be replaced immediately.
Measure Incoming Voltage
Electric water heaters typically require the correct supply voltage to operate properly.
Low voltage can cause:
- Slow heating.
- Incomplete heating cycles.
- Unexpected thermostat behavior.
High voltage can accelerate component wear and increase overheating risks.
If voltage readings are significantly outside the manufacturer’s specifications, the electrical supply should be inspected by a qualified electrician.
Inspect the Thermostat Mounting
Thermostats must sit tightly against the tank wall.
If a thermostat loses firm contact, it may incorrectly sense water temperature and allow overheating before shutting off power.
Check for:
- Loose retaining clips.
- Bent brackets.
- Damaged insulation behind the thermostat.
Look for Hidden Water Leaks
Small leaks can eventually affect electrical components.
Inspect around:
- Heating elements.
- Temperature-pressure relief valve.
- Drain valve.
- Plumbing connections.
- Tank seams.
Water entering electrical compartments can create dangerous short circuits.
Evaluate the Age of the Water Heater
Sometimes multiple components begin failing around the same time simply because the appliance has reached the end of its service life.
Most residential electric water heaters last approximately:
- 8–12 years with average maintenance.
- Up to 15 years with excellent maintenance and favorable water conditions.
An older heater with repeated electrical problems may be more economical to replace than continually repair.
🛑 Understand common heater problems 👉 What Causes a Water Heater to Stop Working?
When Repair Is Not Worth It
Although many reset button issues are inexpensive to repair, there comes a point where replacement offers better long-term value. Spending money on multiple repairs for an aging water heater often leads to additional failures within a short period.
Replacement is usually the smarter option if:
- The tank is leaking.
- The heater is over 10–15 years old and has recurring problems.
- Multiple major components have failed together.
- Electrical wiring inside the heater has extensive heat damage.
- Repair costs approach half the price of a new unit.
- The tank shows significant internal corrosion or rust.
Modern electric water heaters are generally more energy-efficient than older models. If your current unit frequently trips the reset button and struggles to provide enough hot water, replacing it may reduce both maintenance costs and energy consumption over time.
Preventive Maintenance Tips
Preventive maintenance reduces the likelihood of future reset button problems and extends the life of your water heater. Most tasks require only a small amount of time each year but can prevent costly repairs.
Recommended maintenance includes:
- Flush the tank annually to remove sediment.
- Test the temperature-pressure relief valve once a year.
- Check electrical connections for signs of overheating.
- Inspect access panels for moisture.
- Keep thermostat settings around 120°F (49°C) unless higher temperatures are required for a specific application.
- Listen for unusual noises during heating cycles.
- Replace worn insulation around access panels.
- Inspect for small plumbing leaks before they become larger problems.
- Schedule a professional inspection every few years if the heater is aging or heavily used.
A simple maintenance routine often prevents overheating conditions that repeatedly trigger the reset button.
Common Mistakes to Avoid
Many homeowners unintentionally make the troubleshooting process more difficult by focusing on the reset button instead of the underlying fault. Avoiding these common mistakes can save time, money, and frustration.
Common mistakes include:
- Pressing the reset button repeatedly without diagnosing the cause.
- Replacing the high-limit switch before testing thermostats.
- Forgetting to turn off electrical power before opening access panels.
- Restoring power before the tank is completely full.
- Ignoring burning smells or melted wiring.
- Setting thermostats excessively high.
- Assuming the upper and lower heating elements fail together.
- Replacing parts without using a multimeter for confirmation.
- Skipping annual tank flushing in hard-water areas.
- Using replacement parts that do not match the heater’s specifications.
Following a systematic troubleshooting process is almost always faster than replacing components by trial and error.
When to Call a Professional
Some repairs are appropriate for experienced DIY homeowners, while others involve electrical hazards that should not be handled without proper training. Knowing when to stop can prevent injuries and additional damage.
Contact a qualified technician if:
- The circuit breaker continues tripping after replacing obvious faulty parts.
- Wiring has melted or shows evidence of arcing.
- The electrical panel has signs of overheating.
- Voltage readings are abnormal.
- Water has entered electrical compartments.
- The tank itself is leaking.
- You are uncomfortable using a multimeter around energized equipment.
- The heater repeatedly overheats despite replacing thermostats and heating elements.
Likewise, contact a licensed electrician if the problem appears to originate in the home’s electrical supply rather than the water heater itself.
Estimated Repair Costs
The exact cost depends on your location, water heater model, and labor rates, but the table below provides a general estimate for common repairs.
| Repair | Estimated Cost | DIY or Professional |
|---|---|---|
| Reset high-limit switch | $0–$25 | DIY |
| Replace thermostat | $25–$100 | DIY or Professional |
| Replace heating element | $30–$150 | DIY or Professional |
| Repair loose wiring | $50–$250 | Professional recommended |
| Flush water heater | $0–$150 | DIY or Professional |
| Replace high-limit switch | $30–$120 | DIY or Professional |
| Electrical circuit diagnosis | $100–$300 | Professional |
| Replace complete water heater | $900–$2,500+ | Professional |
Final Thoughts
An electric water heater reset button not working is usually a symptom of a larger issue rather than a defective button itself. In many cases, the high-limit switch is doing exactly what it was designed to do—protecting your home by shutting off power when it detects unsafe conditions. The most common causes include faulty thermostats, burned-out heating elements, loose wiring, sediment buildup, and electrical supply problems.
The best approach is to troubleshoot methodically. Start with simple checks such as the circuit breaker and visible wiring, then test components with the proper tools before replacing parts. Always disconnect power before working on the heater, and never bypass built-in safety devices.
Routine preventive maintenance, including annual tank flushing, periodic inspections, and keeping the thermostat at a safe temperature, can significantly reduce the likelihood of future problems. If you encounter repeated breaker trips, melted wiring, tank leaks, or electrical issues beyond basic troubleshooting, don’t hesitate to contact a qualified professional. A careful, safety-first approach will help restore reliable hot water while protecting both your appliance and your home.