
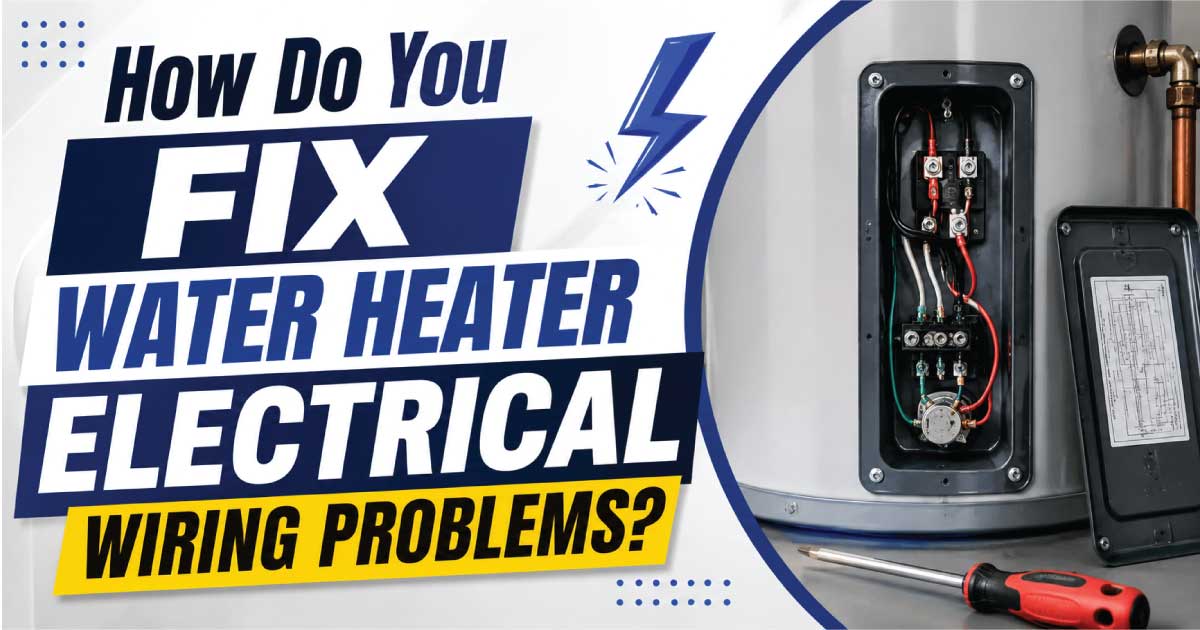
A water heater electrical wiring problem can prevent your unit from heating water, trip your circuit breaker, damage internal components, or even create a serious safety hazard. While many homeowners immediately assume the heating elements or thermostat have failed, faulty wiring is often the real cause. Loose electrical connections, damaged wires, incorrect installation, overloaded circuits, and aging components can all interrupt the power supply and stop the water heater from working properly.
Ignoring electrical problems rarely makes them disappear. A loose wire can overheat, insulation can melt, and poor connections can eventually damage expensive parts inside the heater. In the worst cases, faulty wiring may increase the risk of electrical shock or fire.
This guide explains how a water heater’s electrical system normally works, the most common warning signs of wiring problems, and the likely causes behind those symptoms. You’ll also learn important safety precautions, the basic tools needed for diagnosis, and a logical troubleshooting process that helps you identify the fault before replacing unnecessary parts. Whether you own a traditional electric storage water heater or a newer model, these practical steps will help you understand the problem with confidence.
Common Signs and Symptoms
Electrical wiring problems rarely appear without warning. Many homeowners notice small changes before the water heater stops working completely. Paying attention to these symptoms can help you catch the issue early and avoid more expensive repairs.
Common signs include:
- No hot water at any faucet.
- Water is only lukewarm.
- Hot water runs out much faster than normal.
- Circuit breaker trips repeatedly.
- Reset button on the water heater frequently pops.
- Burning smell near the electrical access panel.
- Buzzing, humming, or crackling sounds.
- Visible scorch marks around wire connections.
- Lights flicker when the heater turns on.
- Water heater works intermittently.
- Error codes on digital control panels.
- Melted wire insulation inside the electrical compartment.
Some symptoms point directly toward an electrical issue. For example, a breaker that trips immediately after resetting often suggests a short circuit, damaged wire, or failed heating element. On the other hand, inconsistent heating may indicate a loose terminal that occasionally loses electrical contact as the heater expands and contracts during normal operation.
A realistic example is a homeowner who notices the shower starts hot but becomes cold much sooner than before. During inspection, one heating element may be receiving power while the other has lost electrical connection because of a loose terminal screw. The heater still functions, but only at half its intended capacity.
Recognizing these early warning signs makes troubleshooting easier and helps prevent additional damage.
How the Appliance or System Normally Works
Understanding normal operation makes it much easier to identify what has gone wrong. Fortunately, the electrical system inside most residential electric water heaters is fairly straightforward.
Electric water heaters usually operate on a dedicated 240-volt circuit protected by a double-pole circuit breaker. Electricity travels from the home’s electrical panel through properly sized wiring into the heater.
The system typically includes:
- Circuit breaker
- Electrical supply cable
- Junction box
- Upper thermostat
- Lower thermostat
- High-temperature safety reset switch
- Upper heating element
- Lower heating element
- Ground wire
Here’s how the process normally works:
- Power enters the water heater through the junction box.
- The upper thermostat first heats the upper portion of the tank.
- Once that reaches the selected temperature, power switches to the lower thermostat.
- The lower heating element warms the remaining water.
- Both thermostats cycle on and off automatically to maintain water temperature.
- The high-limit safety switch disconnects power if overheating occurs.
Every wire in this system has a specific purpose. If one connection becomes loose, corroded, overheated, or broken, electricity may no longer reach the correct component. As a result, the heater may stop producing hot water or operate unpredictably.
Most Common Reasons This Problem Happens
Electrical wiring problems develop for several reasons. Some are caused by age, while others result from installation mistakes, moisture exposure, or poor maintenance. Identifying the exact cause saves time and prevents replacing parts that are still working properly.
Loose Electrical Connections
Loose wire terminals are among the most common wiring faults.
Why it happens
Heating and cooling cycles cause metal to expand and contract. Over many years, terminal screws may gradually loosen.
Symptoms
- Intermittent heating
- Buzzing noises
- Burn marks
- Warm electrical cover
- Random power loss
How to identify it
After disconnecting power, inspect every terminal screw. Dark discoloration, melted insulation, or movement when gently tugging the wire often indicates a poor connection.
Burned or Damaged Wiring
Electrical wires can deteriorate from excessive heat or long-term overload.
Why it happens
High resistance creates heat. Eventually, insulation becomes brittle or melts.
Symptoms
- Burning odor
- Blackened insulation
- Tripped breaker
- No power reaching components
How to identify it
Look for cracked insulation, exposed copper, melted connectors, or signs of overheating inside the wiring compartment.
Incorrect Wiring Installation
Improper installation can create problems immediately or years later.
Why it happens
Previous repairs may have used incorrect wire sizes, loose connectors, reversed terminals, or improper grounding.
Symptoms
- Heater never works correctly
- Frequent breaker trips
- Thermostats malfunction
- Inconsistent water temperature
How to identify it
Compare wiring with the manufacturer’s wiring diagram attached to the heater.
Corrosion and Moisture Damage
Water and electricity are a dangerous combination.
Why it happens
Small leaks around plumbing fittings or condensation can introduce moisture into electrical compartments.
Symptoms
- Green or white corrosion
- Rust around terminals
- Intermittent electrical faults
- Ground faults
How to identify it
Inspect for moisture stains, corrosion, rust, or water entering the electrical access panel.
Damaged Heating Element Creating a Short Circuit
Sometimes the wiring itself is not the original problem.
Why it happens
A failed heating element may short internally and overload the electrical circuit.
Symptoms
- Breaker trips immediately
- Reset button activates
- No hot water
How to identify it
Testing the element with a multimeter often confirms whether it has shorted to ground.
Overloaded Electrical Circuit
Water heaters require their own dedicated circuit.
Why it happens
Sharing the circuit with other large appliances increases electrical load beyond safe limits.
Symptoms
- Breaker trips during heavy electrical use
- Voltage drops
- Slow heating
How to identify it
Verify the water heater is connected to a dedicated breaker according to local electrical code.
Safety Precautions Before Troubleshooting
Working around electrical water heaters requires careful preparation because dangerous voltage remains present until power is properly disconnected. Even experienced technicians treat every inspection as if the wires are energized until testing proves otherwise.
Follow these safety precautions before beginning any diagnosis:
- Turn off the double-pole breaker supplying the water heater.
- Verify power is off using a non-contact voltage tester.
- Confirm voltage with a multimeter before touching wiring.
- Never work with wet hands or while standing on a damp floor.
- Wear insulated gloves and safety glasses.
- Allow hot surfaces to cool before opening access panels.
- Keep children and pets away from the work area.
- Replace damaged insulation before restoring power.
- Never bypass the high-limit safety switch.
- Do not use undersized replacement wire.
- Stop immediately if you smell burning insulation or see smoke.
- If you are uncertain about electrical testing, contact a qualified electrician or appliance repair technician.
A good rule is simple: if live voltage testing is required and you are not comfortable using electrical test equipment safely, do not continue with the repair.
Tools Required
Before starting troubleshooting, gather the right tools. Having everything ready reduces the temptation to improvise, which often leads to mistakes or unsafe working conditions.
| Tool | Purpose |
|---|---|
| Digital multimeter | Measure voltage, continuity, and resistance |
| Non-contact voltage tester | Verify power is disconnected |
| Insulated screwdrivers | Remove access covers and terminals safely |
| Nut driver set | Remove electrical compartment screws |
| Needle-nose pliers | Grip and position wires |
| Flashlight | Inspect dark electrical compartments |
| Wire stripper | Prepare replacement wiring if needed |
| Replacement wire connectors | Repair damaged electrical connections |
| Electrical tape | Protect insulated connections where appropriate |
| Safety gloves and glasses | Personal protection during inspection |
Step-by-Step Troubleshooting Guide
Following a logical troubleshooting sequence prevents unnecessary repairs. Instead of replacing parts at random, inspect the electrical system from the power source toward the heating components until you locate the fault.
Check the circuit breaker.
Inspect whether the dedicated double-pole breaker has tripped. This matters because no downstream component can operate without power. If it remains on, continue to the next step. If it trips again immediately after resetting, avoid repeated resets and investigate for a short circuit.
Confirm power is disconnected.
Use a non-contact tester first, then verify with a multimeter. This step protects you from accidental shock. You should read no voltage at the heater before removing covers. Once confirmed, open the electrical access panels.
Inspect visible wiring.
Look for loose terminals, burned insulation, corrosion, melted connectors, or damaged cables. These visual clues often reveal the fault without additional testing. Tighten only connections that are loose and otherwise undamaged.
Examine the junction box.
Inspect where the home’s supply cable enters the water heater. Loose wire nuts, overheated connections, or damaged insulation can interrupt power before it reaches the thermostats. Repair or replace damaged connectors before continuing.
Check the high-limit reset switch.
Press the reset button once after ensuring the heater has cooled. If it clicks and the heater works normally afterward, monitor it closely. If it trips again, another electrical or heating problem likely exists.
Inspect thermostats and heating element connections.
Look for loose terminal screws, burned wires, or discoloration. These components carry significant current, making secure electrical contact essential. Replace severely overheated terminals rather than simply tightening them.
Test heating elements if wiring appears normal.
Measure resistance and check for shorts to ground using a multimeter. A failed element can mimic a wiring problem by causing breaker trips or preventing water from heating. Replace defective elements before restoring power.
🛑 Find effective water heater fixes 👉 What Causes a Water Heater Reset Button to Fail?
Quick Diagnosis Table
The table below summarizes common symptoms and the most likely causes, making it easier to narrow down the problem before performing more detailed testing.
| Symptom | Possible Cause | Recommended Solution |
|---|---|---|
| No hot water | Tripped breaker, loose wiring, no power supply | Reset breaker once, inspect wiring, verify voltage |
| Breaker trips repeatedly | Shorted heating element, damaged wire | Test elements, inspect wiring, replace damaged parts |
| Burning smell | Loose terminal or overheated wire | Disconnect power immediately and repair connection |
| Water only lukewarm | Loose thermostat connection or failed element | Inspect wiring and test heating elements |
| Heater works intermittently | Loose electrical connection | Tighten or replace affected terminals |
| Reset button keeps tripping | Overheating, faulty thermostat, electrical fault | Diagnose thermostats, elements, and wiring before resetting again |
| Melted wire insulation | Overheated connection or overloaded circuit | Replace damaged wiring and identify the source of overheating |
| Flickering lights when heating | Poor electrical connection or undersized circuit | Inspect supply wiring and verify proper circuit capacity |