
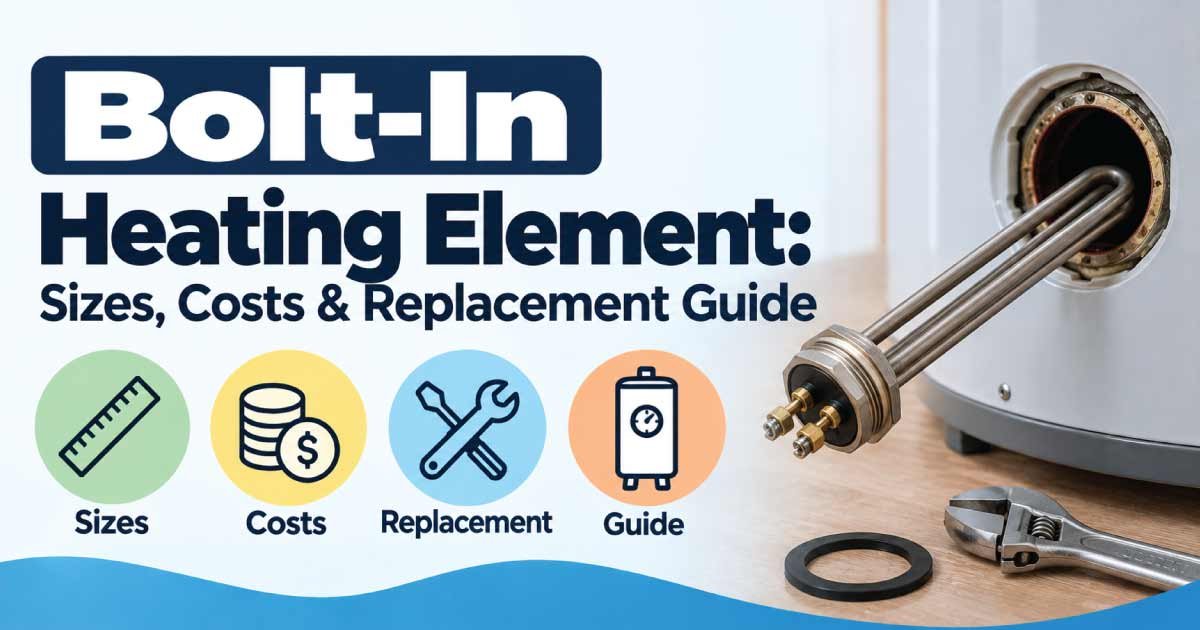
A bolt-in heating element is an important component in many electric storage water heaters, providing the heat needed to raise the temperature of the water inside the tank. When the element fails, you may notice lukewarm water, slow heating, reduced hot-water recovery, or no hot water at all. Replacing the element can often restore normal heating performance, but choosing the correct replacement is essential.
Bolt-in heating elements differ from screw-in elements because they attach to the water heater tank using a flange, gasket, and bolts rather than a threaded connection. They are available in different sizes, wattages, voltages, materials, shapes, and mounting patterns, so an element that looks similar may not necessarily be compatible with your water heater.
In this guide, you’ll learn how bolt-in heating elements work, how to identify the correct size, compare common wattages and voltages, understand high- and low-watt-density options, estimate replacement costs, test a faulty element, and replace it safely. Whether you’re troubleshooting a failed water heater or planning a replacement, this guide will help you understand the specifications that matter most before buying a new bolt-in heating element.
What Is a Bolt-In Heating Element?
A bolt-in heating element is an electric water heater heating element that attaches to the tank through a flat flange secured with multiple bolts. Unlike a screw-in element, which threads directly into a threaded opening, a bolt-in element uses a gasket and bolts to create a watertight seal.
Bolt-in elements are commonly found in older electric storage water heaters, although some replacement and universal elements are designed to work with both older flange configurations and specific replacement applications.
The element sits inside the water tank and converts electrical energy into heat. When the thermostat calls for heat, electrical current passes through the element’s resistance wire, causing the element to heat the surrounding water.
Because bolt-in elements come in different wattages, voltages, flange patterns, lengths, and shapes, selecting the correct replacement is essential.
How Does a Bolt-In Heating Element Work?
A bolt-in heating element operates according to the same basic electrical heating principle as other electric water heater elements.
Electric current passes through a resistance wire inside the element. The resistance generates heat, which is transferred through the metal sheath into the surrounding water.
The thermostat controls when the element receives power. In a typical electric storage water heater, the thermostat switches the element on when the water temperature falls below the selected setting.
The basic heating cycle is:
- The water temperature drops.
- The thermostat detects the lower temperature.
- Electrical power is supplied to the heating element.
- The resistance element produces heat.
- Heat transfers into the surrounding water.
- The thermostat reaches its target temperature.
- Power to the element is switched off.
A bolt-in mounting system does not change this basic heating process. Its main difference is how the element attaches to the tank.
Bolt-In vs. Screw-In Heating Elements
The biggest difference between bolt-in and screw-in elements is the mounting system.
A bolt-in element uses a flange and bolts, while a screw-in element uses a threaded base that screws directly into the tank.
| Feature | Bolt-In Element | Screw-In Element |
|---|---|---|
| Mounting | Flange and bolts | Threaded base |
| Seal | Flat gasket | Threaded gasket/seal |
| Common use | Older tanks and specific models | Many modern residential tanks |
| Removal | Requires bolts to be removed | Unscrews from tank |
| Compatibility | Depends on bolt pattern | Depends on thread size |
| Replacement | Must match flange configuration | Must match thread configuration |
| Typical voltage | 120V or 240V | 120V or 240V |
| Common residential wattage | 3,500–5,500W | 3,500–5,500W |
A bolt-in element should not automatically be replaced with a screw-in element simply because the wattage and voltage are identical. The mounting arrangement must also be compatible.
Common Bolt-In Heating Element Sizes
There is no single universal physical size for every bolt-in heating element.
The correct size depends on the heater model, flange pattern, tank diameter, wattage, voltage, and available clearance.
Common electrical ratings include:
- 1,500W
- 2,000W
- 2,500W
- 3,000W
- 3,500W
- 4,000W
- 4,500W
- 5,000W
- 5,500W
For residential electric water heaters, 240V elements are particularly common. Manufacturer catalogs also show bolt/flange-style elements in 4,500W at 240V configurations.
Typical Bolt-In Element Size Factors
When selecting a replacement, check these dimensions rather than relying only on the wattage.
| Measurement | Why It Matters |
|---|---|
| Voltage | Must match the heater specification |
| Wattage | Determines heating power |
| Element length | Must fit inside the tank |
| Flange diameter | Must match the tank opening |
| Bolt-hole pattern | Must align with the tank |
| Bolt-hole spacing | Determines mounting compatibility |
| Gasket dimensions | Creates the water-tight seal |
| Element shape | Must provide adequate clearance |
| Tank diameter | May affect element clearance |
Bolt-In Heating Element Wattage Guide
Wattage determines how much electrical power the element uses and how quickly it can transfer heat into the water.
Higher wattage generally provides greater heating capacity, but you should never install a higher-wattage element simply to make a water heater heat faster.
The replacement element should match the heater’s rated specifications. Manufacturer and retailer guidance specifically warns against exceeding the water heater nameplate rating.
| Wattage | Typical Application | Heating Power |
|---|---|---|
| 1,500W | Small/low-demand heaters | Low |
| 2,000W | Smaller systems | Low–moderate |
| 2,500W | Residential/special applications | Moderate |
| 3,000W | Medium-demand systems | Moderate |
| 3,500W | Residential systems | Moderate–high |
| 4,000W | Larger heating demand | High |
| 4,500W | Common residential configuration | High |
| 5,500W | High-demand systems | Very high |
The exact permitted wattage depends on the heater’s electrical system, wiring, breaker, thermostat, and manufacturer specifications.
Bolt-In Heating Element Voltage
Voltage is just as important as wattage.
Common electric water heater element voltages include:
- 120V
- 208V
- 240V
- 277V in certain commercial applications
A typical residential electric water heater may use a 240V element. However, you should never assume that every residential heater uses 240V.
Check:
- The water heater data plate
- The original element
- The installation documentation
- The thermostat specifications
A replacement element should have the appropriate voltage rating for the heater. Manufacturer documentation lists multiple combinations of voltage and wattage, demonstrating why both specifications must be checked rather than selecting an element by wattage alone.
Bolt-In Heating Element Length
Element length is another important consideration.
A replacement element needs sufficient clearance inside the tank. An element that is too long may interfere with the tank interior or other components.
An element that is substantially shorter may still heat water, but it may not provide the same heating characteristics as the original design.
Measure the existing element before purchasing a replacement.
When possible, compare:
- Overall element length
- Sheath length
- Element shape
- Flange size
- Bolt-hole position
- Terminal position
Do not use the length alone to determine compatibility.
Bolt-In Flange and Bolt Pattern
The flange is one of the most important differences between bolt-in elements.
The flange attaches the element to the tank opening. Bolts pass through the flange and into the corresponding mounting points on the water heater.
Some universal flange elements are designed to accommodate multiple mounting configurations. For example, certain Camco universal flange elements are supplied with gaskets and bolt hardware and are marketed as replacements for multiple heater models.
Before purchasing a bolt-in replacement, compare the original element’s:
- Number of bolts
- Bolt-hole spacing
- Flange shape
- Flange diameter
- Terminal arrangement
- Gasket shape
This prevents a common replacement mistake: purchasing the correct wattage but the wrong physical mounting pattern.
High-Watt-Density vs. Low-Watt-Density Bolt-In Elements
Heating elements can also be classified according to watt density.
High-Watt-Density Elements
High-watt-density elements concentrate more heat over a smaller surface area.
Advantages include:
- Lower initial cost
- Common availability
- Compact design
- Fast heating capability
Potential disadvantages include:
- Greater surface temperature
- More susceptibility to mineral buildup
- Potentially shorter service life in harsh water conditions
Low-Watt-Density Elements
Low-watt-density elements spread the heating load across a larger surface area.
They are often preferred where water contains significant mineral or lime deposits.
Low-watt-density designs can reduce hot spots and help limit mineral buildup on the heating surface.
| Feature | High Watt Density | Low Watt Density |
|---|---|---|
| Surface heating concentration | Higher | Lower |
| Element size | Usually more compact | Often larger/foldback |
| Hard-water suitability | Moderate | Better |
| Mineral buildup resistance | Lower | Better |
| Typical cost | Lower | Slightly higher |
| Heating performance | Strong | Strong |
| Service considerations | More scale-sensitive | Better for problem water |
Bolt-In Heating Element Materials
The heating sheath may be made from different materials.
Common materials include:
- Copper
- Stainless steel
- Nickel-chromium alloys
- Incoloy-type alloys
Copper elements are widely available and often economical.
Stainless and nickel-chromium alloy elements may be selected for particular water conditions or durability requirements. Manufacturer catalogs include low- and ultra-low-watt-density elements using nickel-chromium stainless steel alloys for demanding water conditions.
Material selection should be based on the heater manufacturer’s specifications and the water conditions rather than price alone.
How Much Does a Bolt-In Heating Element Cost?
The price of a bolt-in heating element varies considerably based on wattage, material, design, brand, and whether it is a standard or universal replacement.
As a current market reference, a Camco 4,500W/240V universal flange element was listed around $17.99 at Lowe’s when checked, while other 4,500W elements can vary significantly depending on construction and supplier.
A practical replacement budget is:
| Element Type | Approximate Cost Range |
|---|---|
| Basic bolt-in element | $10–$20 |
| Standard 4,500W element | $12–$25 |
| Low-watt-density element | $15–$35 |
| Premium alloy element | $20–$50+ |
| Universal flange element | $15–$35 |
| Element + thermostat kit | $30–$70+ |
Prices vary by brand, location, availability, and retailer, so use these figures as planning estimates rather than fixed prices.
Signs a Bolt-In Heating Element Is Bad
A failed heating element can produce several recognizable symptoms.
No Hot Water
If an electric water heater produces little or no hot water, a failed element is one possible cause.
However, also check:
- Circuit breaker
- Thermostat
- Wiring
- High-limit switch
- Other heating element
Slow Hot Water Recovery
A partially damaged or incorrectly functioning element can contribute to slow recovery.
In a dual-element heater, the upper element may heat first before the lower element takes over for normal recovery.
Breaker Keeps Tripping
A grounded or electrically damaged element can cause the circuit breaker to trip.
Electrical testing can help determine whether the element has continuity or is shorted to ground.
Water Is Only Lukewarm
Lukewarm water can indicate:
- Failed heating element
- Defective thermostat
- Incorrect wiring
- Electrical supply problem
- Sediment accumulation
- Temperature setting problem
Therefore, replacing the element without testing the rest of the system can waste time and money.
How to Test a Bolt-In Heating Element
Testing should be performed only after the heater has been safely disconnected from electrical power.
Turn Off the Power
Switch off the circuit breaker supplying the water heater.
Do not assume the heater is safe simply because the thermostat is not calling for heat.
Verify that power is absent using an appropriate electrical tester.
Access the Element
Remove the access panel and insulation as necessary to expose the thermostat and element terminals.
Do not damage the insulation because it helps maintain safe operating temperatures.
Disconnect the Element Wires
Remove the wires from the element terminals so that the resistance measurement is not affected by other components.
Measure Resistance
Set a multimeter to an appropriate resistance range.
Place one probe on each element terminal.
A working element normally shows a resistance value rather than infinite resistance.
For example, a 4,500W element operating at 240V has an approximate resistance of:
R = V² ÷ P
R = 240² ÷ 4,500
R ≈ 12.8 ohms
The exact reading can vary slightly.
Check for a Grounded Element
Test between an element terminal and the metal tank or element flange.
An element that shows an unintended electrical path to ground may be defective.
If you are not comfortable performing electrical testing, use a qualified technician.
Discover More:
Tools Needed for Bolt-In Element Replacement
The exact tools vary according to the heater design.
Common tools include:
- Replacement bolt-in heating element
- Correct replacement gasket
- Socket wrench
- Appropriate socket
- Screwdriver
- Adjustable wrench if required
- Multimeter
- Non-abrasive cleaning material
- Bucket or hose for draining
- Flashlight
- Torque tool where specified by the manufacturer
Use the correct element removal tool for the specific flange and fastener design.
How to Replace a Bolt-In Heating Element
Turn Off Electrical Power
Switch off the water heater’s circuit breaker.
This is the most important safety step.
Verify that electrical power is absent before touching wiring or terminals.
Turn Off the Water Supply
Close the cold-water supply valve feeding the heater.
This helps prevent additional water from entering the tank during the repair.
Relieve Pressure
Open a hot-water faucet to relieve pressure in the system.
Use caution because the water may still be hot.
Drain the Tank
Connect a suitable hose to the drain valve and route it to an appropriate drainage location.
Open the drain valve.
Depending on the location and condition of the heater, draining may take some time.
Remove the Existing Element
Disconnect the electrical wires from the element.
Remove the bolts holding the flange against the tank.
Carefully pull the old element away from the tank.
If the element has significant scale buildup, removal may require additional care.
Clean the Mounting Surface
Remove old gasket material, mineral deposits, and debris from the tank’s mounting surface.
Do not damage the tank flange.
The surface should be clean enough for the new gasket to create a reliable seal.
Install the New Gasket
Install the correct gasket supplied or specified for the replacement element.
Do not reuse an old gasket if the manufacturer recommends replacement.
Install the New Element
Position the new element carefully inside the tank.
Align the flange and bolt holes.
Install the bolts evenly.
Tighten them gradually in a crisscross pattern to help distribute gasket pressure.
Do not overtighten the bolts.
Reconnect the Wiring
Reconnect the electrical wires to the correct terminals.
Follow the heater’s wiring diagram.
Loose electrical connections can create excessive resistance and heat.
Refill the Tank Before Restoring Power
Open the cold-water supply.
Open a hot-water faucet.
Allow the tank to fill until water flows steadily from the faucet without significant air.
This step is critical.
An electric heating element should not be energized while exposed to air because dry firing can damage the element.
Restore Electrical Power
Once the tank is completely filled, close the hot-water faucet and inspect the installation for leaks.
Only after confirming that the element is submerged should you restore electrical power.
Discover More:
Common Bolt-In Heating Element Replacement Mistakes
Several mistakes can lead to leaks, premature failure, or electrical problems.
Choosing by Wattage Alone
A 4,500W element is not automatically compatible with every 4,500W water heater.
The flange and bolt pattern must also match.
Using the Wrong Voltage
Installing an element with an incorrect voltage rating can cause serious performance and safety problems.
Always verify the heater nameplate.
Installing a Higher-Wattage Element
A higher-wattage element may exceed the heater’s electrical design.
Replacement guidance warns against exceeding the heater nameplate rating.
Reusing the Old Gasket
A compressed or damaged gasket may leak after reinstallation.
Use the correct new gasket whenever required.
Turning on Power Before Filling the Tank
This is one of the most damaging mistakes.
The element must be submerged before electrical power is restored.
Ignoring Mineral Deposits
Heavy sediment or mineral buildup can affect heating performance and element life.
If the tank has substantial buildup, inspect the condition of the tank and consider appropriate flushing or professional service.
Discover More:
Bolt-In vs. Universal Flange Elements
A universal flange element can be useful when an exact replacement is difficult to locate.
Some universal designs are supplied with hardware and multiple gasket arrangements and are intended to replace various flange-style elements.
However, “universal” does not mean compatible with every water heater.
Before purchasing, verify:
- Voltage
- Wattage
- Flange dimensions
- Bolt-hole pattern
- Element clearance
- Tank diameter
- Gasket configuration
- Terminal configuration
The heater manufacturer’s compatibility information should take priority.
Bolt-In Heating Element Maintenance
Regular maintenance can help extend element life.
Flush the Tank
Sediment can accumulate at the bottom of a storage water heater.
Periodic flushing can reduce sediment accumulation, although the correct maintenance schedule depends on the heater and water conditions.
Check for Leaks
Inspect around the element flange for:
- Drips
- Moisture
- Corrosion
- Rust
- Mineral deposits
A small leak should not be ignored because water can damage electrical components.
Inspect Electrical Connections
During appropriate maintenance, connections should be checked for signs of:
- Discoloration
- Burning
- Corrosion
- Loose terminals
- Melted insulation
Electrical work should be performed safely and according to local requirements.
How to Choose the Right Bolt-In Heating Element
Use this checklist before ordering a replacement.
| Specification | What to Check |
|---|---|
| Element type | Bolt-in/flange |
| Voltage | Match heater rating |
| Wattage | Match heater rating |
| Flange | Match original |
| Bolt pattern | Match original |
| Gasket | Correct replacement |
| Length | Confirm tank clearance |
| Shape | Straight/foldback/etc. |
| Material | Copper/stainless/alloy |
| Watt density | HWD/LWD |
| Tank diameter | Verify manufacturer requirements |
| Brand/model | Confirm compatibility |
The best replacement is not necessarily the cheapest one. The correct element is the one that matches the heater’s electrical and mechanical specifications.
When Should You Replace a Bolt-In Heating Element?
Replacement is generally appropriate when testing confirms that the element has failed or when it has developed significant physical damage.
Common replacement indicators include:
- Open electrical circuit
- Ground fault
- Burned element
- Severe corrosion
- Physical cracking
- Repeated breaker trips caused by the element
- Persistent heating failure after thermostat and power checks
- Significant mineral damage
If the tank itself is leaking, replacing the element may not solve the underlying problem.
A leaking tank can indicate internal tank failure, which is a much more significant repair.
Bolt-In Heating Element FAQs
Are bolt-in and screw-in heating elements interchangeable?
Not automatically. They use different mounting systems. A compatible conversion or universal flange design may exist for some heaters, but compatibility must be verified.
What is the most common bolt-in heating element wattage?
4,500W at 240V is a common residential configuration, but the correct wattage depends on the water heater nameplate and original element.
Can I use a higher-wattage bolt-in element?
You should not exceed the heater’s specified wattage. Always follow the nameplate and manufacturer specifications.
Can I replace a bolt-in element with a universal element?
Some universal flange elements are designed for multiple mounting configurations, but you still need to verify voltage, wattage, flange pattern, gasket, and clearance.
How long does a bolt-in heating element last?
Service life varies according to water chemistry, operating temperature, mineral buildup, element quality, and maintenance. Hard-water conditions can be particularly challenging for heating elements.
Why does my new bolt-in element keep failing?
Possible causes include:
- High mineral buildup
- Incorrect voltage
- Incorrect wattage
- Dry firing
- Poor electrical connections
- Incorrect thermostat operation
- Water quality problems
- Defective replacement element
Does low watt density make an element more efficient?
Low watt density does not necessarily mean the heater uses less total energy for the same heating task. Its main advantage is spreading heat over a larger surface area, which can reduce hot spots and mineral buildup.
Should I replace both elements at the same time?
Not necessarily. If only one element has failed, testing can determine whether the other is still functioning. However, if both are old and accessible, some homeowners may choose to replace them together.
Bolt-In Heating Element Replacement Checklist
Before beginning the job, confirm:
- Correct element type
- Correct voltage
- Correct wattage
- Correct flange
- Correct bolt pattern
- Correct gasket
- Correct length
- Correct element shape
- Power completely disconnected
- Tank safely drained
- Old gasket removed
- Mounting surface cleaned
- New element installed evenly
- Electrical connections tightened correctly
- Tank completely refilled
- No leaks present
- Power restored only after the element is submerged
Final Thoughts on Bolt-In Heating Elements
A bolt-in heating element is a practical replacement component for compatible electric storage water heaters, especially models that use a flange-and-bolt mounting system.
The most important factors are not simply price or wattage. You need to match the voltage, wattage, flange, bolt pattern, gasket, element length, shape, and tank clearance.
For many residential applications, 240V and 4,500W elements are common, but never assume that specification is correct for your particular heater. Always check the water heater nameplate and the existing element before purchasing a replacement.
During replacement, electrical safety is critical. Turn off power, verify that the circuit is dead, drain the tank appropriately, install the correct gasket, and make certain the tank is completely full before restoring electrical power.
Choosing the correct bolt-in element and installing it properly can restore heating performance while helping prevent leaks, premature element failure, and unnecessary electrical problems.