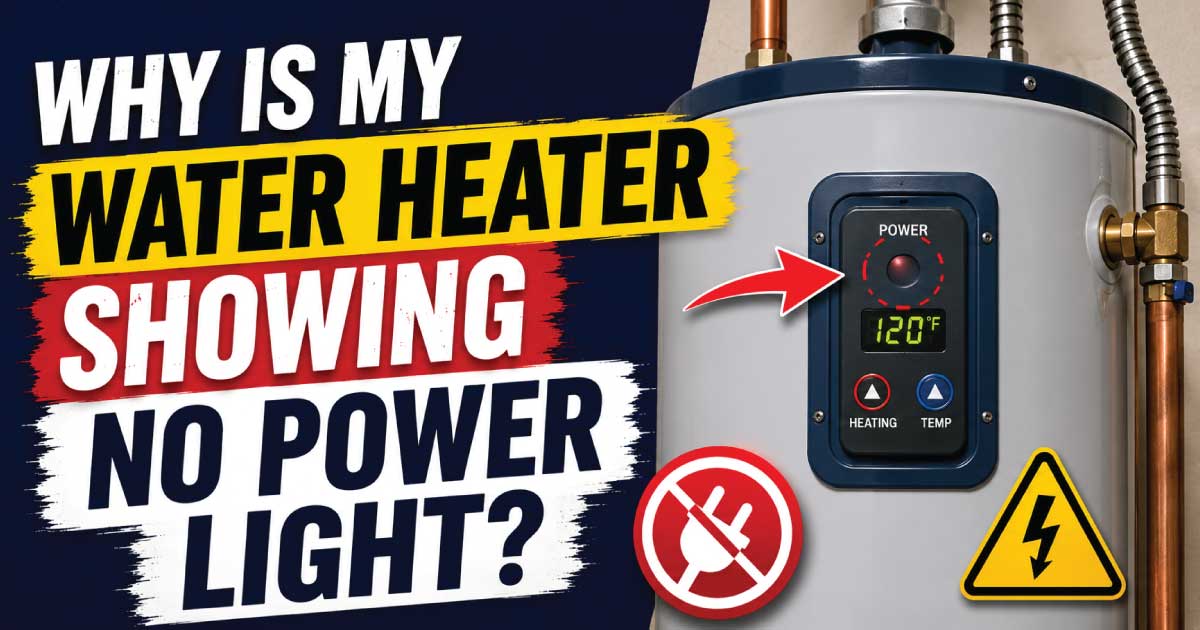
A water heater no power light problem is one of the most frustrating issues homeowners can face. Whether you have an electric, gas, tank, or tankless water heater, a power indicator light that stays off usually means the appliance is not receiving power, has entered a safety shutdown, or has developed an internal fault. Without proper diagnosis, it’s easy to replace the wrong part or overlook a simple fix.
The good news is that many causes can be identified with a careful inspection before spending money on repairs. In some cases, the solution is as simple as resetting a tripped breaker or pressing a reset button. In others, the issue may involve faulty wiring, a failed control board, or damaged heating components that require professional attention.
This guide walks you through the most common reasons a water heater has no power light, explains how the system normally works, outlines essential safety precautions, and provides a logical troubleshooting process that even beginners can follow. By the end of this guide, you’ll know how to narrow down the cause, determine whether it’s safe to perform a DIY repair, and understand when it’s time to call a qualified technician.
Common Signs and Symptoms
A water heater rarely fails without leaving clues. Understanding the symptoms helps you identify whether the problem is related to the electrical supply, internal controls, heating system, or safety devices. Paying attention to these warning signs can save time during troubleshooting.
You may notice one or more of the following symptoms:
- The power indicator light remains completely off.
- No hot water is available anywhere in the house.
- The display panel is blank on digital models.
- The reset button repeatedly trips.
- The circuit breaker trips after being reset.
- The water heater does not make its usual operating sounds.
- The thermostat does not respond to adjustments.
- The unit suddenly stopped working after a power outage.
- A burning smell is present near the electrical compartment.
- The appliance worked normally the previous day but now appears completely dead.
Some homeowners also report intermittent operation. The power light may occasionally turn on before shutting off again. This often points to a loose electrical connection, an overheating component, or a failing control board rather than a complete loss of incoming power.
If your home has experienced recent electrical work, lightning, flooding, or plumbing repairs, those events may also contribute to the problem.
How the Appliance or System Normally Works
Before troubleshooting a failed power light, it helps to understand how a water heater normally operates. Knowing the basic sequence makes it much easier to identify where the failure has occurred.
An electric water heater receives power from a dedicated circuit breaker in your home’s electrical panel. Electricity travels through wiring to the thermostat and safety controls before reaching the heating elements. Many modern units include a control board or indicator light that confirms electrical power is available.
When water temperature drops below the thermostat setting:
- The thermostat detects the lower temperature.
- Electrical power is sent to the heating element.
- The element heats the water.
- Once the target temperature is reached, power to the element is switched off.
- The indicator light may remain on or cycle depending on the manufacturer.
Gas water heaters with electronic controls work somewhat differently. They still require electrical power for the control board, ignition system, display, and safety sensors. If electrical power is interrupted, the gas burner often cannot ignite, even if gas is available.
Tankless water heaters rely even more heavily on electronics. Their displays, sensors, fans, ignition systems, and diagnostic controls all require stable electrical power before the appliance can produce hot water.
Understanding this sequence helps explain why a missing power light often indicates a failure early in the operating process rather than a heating element problem alone.
Most Common Reasons This Problem Happens
A water heater can lose power for several reasons. Some are simple homeowner fixes, while others require electrical testing and replacement parts. Identifying the correct cause prevents unnecessary repairs and reduces the risk of further damage.
Tripped Circuit Breaker
A tripped breaker is one of the most common reasons a water heater has no power light.
Why it happens
Circuit breakers trip to protect wiring from overloads, short circuits, or ground faults.
Symptoms
- Completely dead water heater
- No indicator light
- No display
- No hot water
How to identify it
Locate your home’s electrical panel and check whether the water heater breaker is in the middle or OFF position.
Blown Fuse
Older homes may use fuse panels instead of circuit breakers.
Why it happens
A power surge or electrical fault causes the fuse to fail.
Symptoms
- Sudden loss of power
- Indicator light off
- Water heater appears completely inactive
How to identify it
Inspect the fuse for visible damage or test it using a multimeter.
Tripped High-Temperature Reset Switch
Most electric water heaters include a manual reset switch designed to prevent overheating.
Why it happens
The thermostat sticks, heating elements overheat, or electrical problems cause excessive temperatures.
Symptoms
- Water heater stopped unexpectedly
- No heating
- Reset restores temporary operation
How to identify it
Remove the upper access panel and locate the red reset button behind the insulation.
Loose or Burned Wiring
Electrical connections can loosen over time because of vibration and repeated heating cycles.
Why it happens
Loose terminals create resistance, generating heat that damages connectors.
Symptoms
- Flickering power light
- Burning odor
- Discolored wiring
- Intermittent operation
How to identify it
After disconnecting power, inspect visible wiring for scorch marks, melted insulation, or loose terminals.
Failed Thermostat
The thermostat controls when heating begins and ends.
Why it happens
Age, wear, electrical damage, or internal failure prevent normal operation.
Symptoms
- Inconsistent water temperature
- Reset button trips repeatedly
- No heating despite available power
How to identify it
A continuity test with a multimeter usually confirms whether the thermostat functions properly.
Defective Control Board
Modern water heaters depend on electronic control boards to coordinate operation.
Why it happens
Power surges, moisture, age, or component failure can damage sensitive electronics.
Symptoms
- Blank display
- No power indicator
- Error codes before complete failure
- Random shutdowns
How to identify it
Visible burn marks, corrosion, or manufacturer diagnostic procedures often reveal board failure.
Power Supply Problems
Sometimes the water heater itself is not the problem.
Why it happens
Electrical outlets, disconnect switches, damaged wiring, or utility interruptions prevent power from reaching the appliance.
Symptoms
- Entire unit remains inactive
- Other nearby appliances may also lose power
How to identify it
Verify voltage at the disconnect switch and incoming supply if you have the proper testing equipment.
Safety Precautions Before Troubleshooting
Working around electricity, hot water, and gas appliances requires careful preparation. Even experienced technicians begin every diagnosis by making the work area safe. Following these precautions reduces the risk of injury and prevents accidental equipment damage.
Before inspecting your water heater:
- Turn off the dedicated circuit breaker before removing any access panels.
- Confirm power is off using a non-contact voltage tester.
- Never touch exposed wiring with bare hands.
- Allow hot water inside the tank to cool if maintenance may involve draining the unit.
- Shut off the gas supply before inspecting gas-fired models.
- Keep the work area dry to reduce electrical shock hazards.
- Wear insulated gloves and safety glasses.
- Avoid bypassing safety switches or thermal cutoffs.
- Replace protective covers before restoring power.
- Stop immediately if you smell gas, notice sparking, or see melted wiring.
DIY work is generally appropriate for visual inspections, resetting breakers, and checking accessible components. Internal electrical testing, gas system repairs, and control board replacement should only be performed by individuals familiar with appliance diagnostics and electrical safety.
Tools Required
Having the proper tools makes troubleshooting safer and more accurate. Most basic inspections require only a few common household tools.
| Tool | Purpose |
|---|---|
| Non-contact voltage tester | Verify power is off before working |
| Digital multimeter | Measure voltage, continuity, and resistance |
| Phillips screwdriver | Remove access panels |
| Flat-head screwdriver | Open electrical covers and terminals |
| Flashlight | Inspect dark compartments |
| Needle-nose pliers | Handle small connectors safely |
| Insulated work gloves | Protect hands from electrical hazards |
| Safety glasses | Protect eyes from debris and accidental sparks |
| Camera or smartphone | Record wiring before disassembly |
| Owner’s manual | Locate model-specific reset buttons and diagnostic information |
Step-by-Step Troubleshooting Guide
A structured troubleshooting process helps isolate the fault without replacing parts unnecessarily. Begin with the simplest checks before moving toward more detailed inspections. This approach mirrors the method used by experienced appliance repair technicians.
Check for household power.
Inspect whether other appliances and lights are working nearby. This determines whether the issue is isolated to the water heater or affects the home’s electrical supply. If multiple circuits have no power, investigate the home’s electrical service before focusing on the appliance.
Inspect the circuit breaker.
Look for a breaker that has tripped or is sitting between the ON and OFF positions. Reset it once if appropriate. If it immediately trips again, stop troubleshooting and investigate for an electrical fault rather than repeatedly resetting it.
Verify the disconnect switch.
Many water heaters have a dedicated disconnect switch mounted nearby. Ensure it is fully in the ON position. A switched-off disconnect will prevent the power light from illuminating even if the breaker is functioning correctly.
Look for visible damage.
Examine the exterior, access panels, and wiring compartment for burn marks, melted insulation, corrosion, moisture, or signs of overheating. Visible damage often points directly to the affected area and indicates that further electrical testing may be necessary.
Check the high-temperature reset button.
After disconnecting power and removing the upper access panel, locate the manual reset button. If it has tripped, press it firmly until it clicks, then restore power and observe whether the indicator light returns. If it trips again, another component is likely causing overheating.
Inspect accessible wiring connections.
Ensure all visible wire terminals are secure and free of discoloration. Loose connections create excessive heat and can interrupt power to the controls. Tighten only if power is disconnected and you are comfortable working with electrical connections.
Observe the power indicator after restoring power.
If the light comes on and stays steady, the problem may have been a simple reset or loose connection. If it remains off or quickly turns off again, deeper component testing is required.
Quick Diagnosis Table
This quick reference helps match common symptoms with likely causes before moving on to repairs.
| Symptom | Possible Cause | Recommended Solution |
|---|---|---|
| No power light and no hot water | Tripped breaker | Reset breaker and monitor operation |
| Blank display panel | No electrical supply | Verify breaker, disconnect switch, and incoming voltage |
| Reset button keeps tripping | Faulty thermostat or overheating | Inspect thermostat and heating elements |
| Power light flickers | Loose wiring connection | Inspect and tighten connections safely |
| Burning smell near unit | Overheated wiring | Disconnect power and inspect immediately |
| Water heater dead after storm | Power surge or damaged control board | Check incoming power and inspect electronics |
| Breaker trips repeatedly | Short circuit or failed heating element | Stop resetting breaker and perform electrical diagnosis |
| Intermittent operation | Loose connection or failing control board | Inspect wiring and monitor system behavior |