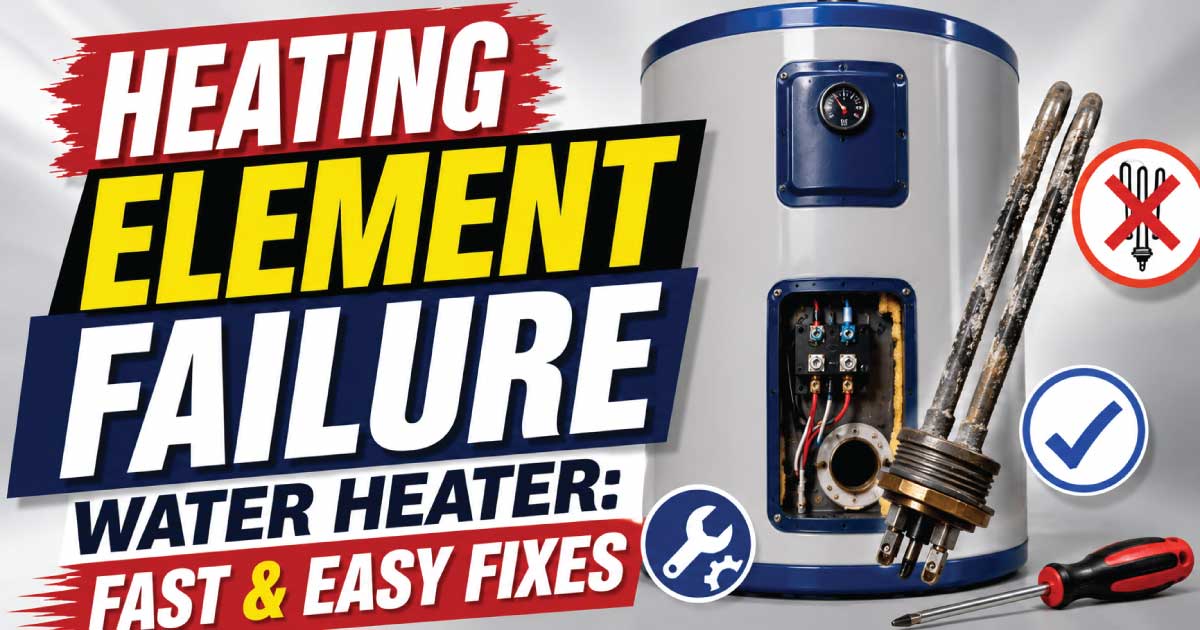
A heating element failure water heater is one of the most common reasons an electric water heater stops producing enough hot water or stops heating altogether. Although the problem may seem serious, it often starts with small warning signs that homeowners overlook, such as lukewarm water, longer heating times, or inconsistent temperatures. Recognizing these symptoms early can prevent further damage and reduce repair costs.
Electric water heaters rely on one or two heating elements to warm the water inside the tank. When either element fails, the system cannot operate as designed. The cause may be something as simple as mineral buildup, a tripped reset button, loose wiring, or a worn-out heating element after years of use. In other cases, electrical faults or thermostat problems may be responsible.
This guide explains how to recognize the symptoms, understand how your water heater works, identify the most common causes of heating element failure, and safely troubleshoot the problem before deciding whether you can perform a DIY repair or need professional assistance. By following a logical diagnosis process, you can avoid replacing good parts unnecessarily and restore reliable hot water more efficiently.
Common Signs and Symptoms
Before replacing parts, it is important to understand what your water heater is telling you. Different symptoms often point to different failures. Paying attention to how the water heater behaves can save both time and money during troubleshooting.
Common symptoms of a heating element failure include:
No hot water at all
- Usually indicates both heating elements have stopped working, the power supply has failed, or the high-limit reset has tripped.
Only lukewarm water
- Often means one heating element has failed while the other continues to operate.
Hot water runs out quickly
- A failed lower heating element commonly causes this problem because only the upper portion of the tank is being heated.
Water takes much longer to heat
- Heating may still occur, but at a much slower rate because only one element is functioning.
Water temperature changes unexpectedly
- Faulty thermostats or intermittent electrical connections may prevent consistent heating.
Circuit breaker trips repeatedly
- A shorted heating element or damaged wiring may be drawing excessive current.
Reset button keeps tripping
- This often points to overheating, thermostat failure, or an electrical issue requiring further diagnosis.
Unusual humming or sizzling sounds
- Mineral deposits around the heating element can trap heat and reduce efficiency.
Higher electricity bills
- A partially failed element may operate longer than normal while producing less heat.
For example, if a family suddenly notices that the first person gets a warm shower while everyone else gets cold water, the lower heating element is often the first component worth inspecting.
How the Appliance or System Normally Works
Understanding how an electric water heater normally operates makes it much easier to identify what has gone wrong. Most residential electric water heaters follow a simple heating sequence controlled by thermostats and heating elements.
A typical electric water heater contains:
- Upper heating element
- Lower heating element
- Upper thermostat
- Lower thermostat
- High-temperature safety switch (reset button)
- Insulated storage tank
Here’s how the process normally works:
- Cold water enters the bottom of the tank.
- The upper thermostat checks water temperature near the top.
- If needed, the upper heating element heats the upper section first.
- Once the upper water reaches the target temperature, power switches to the lower thermostat.
- The lower heating element heats the remaining water.
- Hot water exits from the top whenever a faucet is opened.
Most residential electric water heaters do not operate both heating elements simultaneously. Instead, they heat the tank in stages. This explains why one failed element can still provide some hot water, although recovery time becomes much slower.
Knowing this operating sequence helps narrow down which component may be malfunctioning based on the symptoms you observe.
Most Common Reasons This Problem Happens
Heating element failures rarely happen without a reason. Identifying the underlying cause helps ensure you fix the actual problem instead of simply replacing a damaged part that may fail again.
Burned-Out Heating Element
Heating elements naturally wear out after years of repeated heating and cooling cycles. Internal wires eventually break or the element burns open.
Why it happens
- Normal aging
- Heavy daily usage
- Dry firing after the tank was emptied without refilling
Symptoms
- No heat from one section of the tank
- Reduced hot water capacity
- Slow recovery
How to identify it
- Test continuity with a multimeter.
- An open circuit usually confirms the element has failed.
Mineral Scale Buildup
Hard water leaves mineral deposits on heating elements over time. Thick scale acts like insulation, making the element work much harder.
Why it happens
- Hard water
- Infrequent tank flushing
- Years of sediment accumulation
Symptoms
- Longer heating times
- Crackling or popping noises
- Reduced efficiency
How to identify it
- Inspect the removed heating element.
- Look for thick white or brown mineral deposits.
Faulty Thermostat
Sometimes the heating element is perfectly functional, but it never receives power because the thermostat has failed.
Why it happens
- Internal electrical wear
- Overheating
- Age-related failure
Symptoms
- Water too hot or too cold
- Inconsistent heating
- Heating element tests good
How to identify it
- Measure voltage output.
- Compare thermostat readings with manufacturer specifications.
Loose or Burned Electrical Connections
Heating elements require strong electrical connections. Loose terminals create resistance that generates excessive heat.
Why it happens
- Vibration
- Improper installation
- Corrosion
Symptoms
- Intermittent heating
- Burn marks
- Melted wire insulation
How to identify it
- Perform a visual inspection after disconnecting power.
- Look for discoloration or damaged connectors.
High-Limit Switch Has Tripped
The reset button protects the water heater from overheating.
Why it happens
- Faulty thermostat
- Overheating
- Electrical malfunction
Symptoms
- Complete loss of hot water
- Reset temporarily restores operation
How to identify it
- Press the reset button after turning off power.
- If it trips again, further diagnosis is necessary.
Power Supply Problems
Without proper voltage, neither heating element can operate.
Why it happens
- Tripped breaker
- Blown fuse
- Damaged wiring
Symptoms
- Completely cold water
- No heating activity
How to identify it
- Verify supply voltage with a multimeter.
- Inspect the electrical panel.
Safety Precautions Before Troubleshooting
Working on a water heater involves electricity, hot water, and pressurized plumbing. Taking a few minutes to prepare safely greatly reduces the risk of injury and equipment damage.
Always follow these precautions before beginning any inspection:
- Turn off the circuit breaker supplying the water heater.
- Confirm power is actually off using a non-contact voltage tester.
- Never trust the breaker label alone.
- Allow hot water inside the tank to cool if burns are possible.
- Wear insulated gloves and safety glasses.
- Keep the surrounding floor dry.
- Avoid standing in water while working.
- Never remove a heating element from a full, pressurized tank.
- Shut off the water supply before draining the tank if element removal is required.
- Replace damaged insulation exactly as it was installed.
- Use only replacement parts with matching voltage and wattage ratings.
- If wiring appears burned, melted, or severely damaged, stop troubleshooting and arrange for professional repair.
If you are uncomfortable using electrical testing equipment or interpreting voltage readings, it is safer to leave electrical diagnosis to a qualified technician.
Tools Required
Having the right tools before starting helps you complete the inspection safely and efficiently without unnecessary delays.
| Tool | Purpose |
|---|---|
| Non-contact voltage tester | Confirm power is off |
| Digital multimeter | Test voltage, continuity, and resistance |
| Screwdriver set | Remove access panels and terminals |
| Heating element wrench | Remove and install heating elements |
| Adjustable wrench | Disconnect plumbing if necessary |
| Garden hose | Drain the water heater tank |
| Bucket | Collect remaining water |
| Flashlight | Inspect wiring and components |
| Safety gloves | Protect hands from heat and sharp edges |
| Safety glasses | Protect eyes during inspection |
Step-by-Step Troubleshooting Guide
A systematic diagnosis prevents unnecessary part replacement. Start with the easiest inspections before moving on to electrical testing or component removal.
Verify the power supply.
- What to inspect: Check the circuit breaker and confirm voltage reaches the water heater.
- Why it matters: A heater without power cannot heat water regardless of component condition.
- Expected result: Breaker is on and correct voltage is present.
- What to do next: If power is missing, correct the electrical supply before continuing.
Check the reset button.
- What to inspect: Remove the upper access panel and press the high-limit reset.
- Why it matters: An overheated system may have shut itself down.
- Expected result: The button remains engaged after resetting.
- What to do next: If it trips again, investigate the thermostat or electrical system.
Inspect visible wiring.
- What to inspect: Look for loose terminals, burned insulation, or corrosion.
- Why it matters: Damaged wiring can interrupt power or create dangerous overheating.
- Expected result: Clean, tight electrical connections.
- What to do next: Repair damaged wiring before replacing heating elements.
Test both heating elements.
- What to inspect: Use a multimeter to check continuity and resistance.
- Why it matters: Burned-out elements are among the most common failures.
- Expected result: Readings fall within the manufacturer’s expected resistance range.
- What to do next: Replace any element that shows an open circuit or signs of damage.
Evaluate thermostat operation.
- What to inspect: Confirm each thermostat sends power to its heating element when heating is needed.
- Why it matters: A working element cannot heat without electrical control.
- Expected result: Voltage is delivered correctly during the heating cycle.
- What to do next: Replace a thermostat that fails testing.
Look for sediment-related issues.
- What to inspect: Listen for popping sounds and inspect drained water for heavy sediment.
- Why it matters: Mineral buildup reduces heating efficiency and shortens element life.
- Expected result: Minimal sediment accumulation.
- What to do next: Flush the tank if significant deposits are present.
Monitor heater performance after inspection.
- What to inspect: Observe water temperature and recovery time after restoring power.
- Why it matters: Proper operation confirms the diagnosis was accurate.
- Expected result: Consistent hot water with normal recovery.
- What to do next: If problems continue, more advanced diagnosis may be required.
🛑 Understand common heater problems 👉 Why Is My Water Heater Tank Leaking? Easy Guide
Quick Diagnosis Table
This quick-reference table helps match common symptoms with likely causes, making it easier to decide what to inspect first.
| Symptom | Possible Cause | Recommended Solution |
|---|---|---|
| No hot water | Power loss or both heating elements failed | Check breaker, reset switch, and test both elements |
| Lukewarm water | One heating element failed | Test upper and lower elements with a multimeter |
| Hot water runs out quickly | Lower heating element failure | Inspect and replace the lower element if defective |
| Water overheats | Faulty thermostat | Test and replace the thermostat |
| Breaker keeps tripping | Shorted heating element or wiring | Disconnect power and inspect electrical components |
| Reset button trips repeatedly | High-limit switch reacting to overheating | Diagnose thermostat and electrical faults |
| Popping or sizzling sounds | Heavy sediment buildup | Flush the tank and inspect heating elements |
| Heating is unusually slow | Scale-covered or weakening heating element | Clean the tank and replace the affected element if necessary |