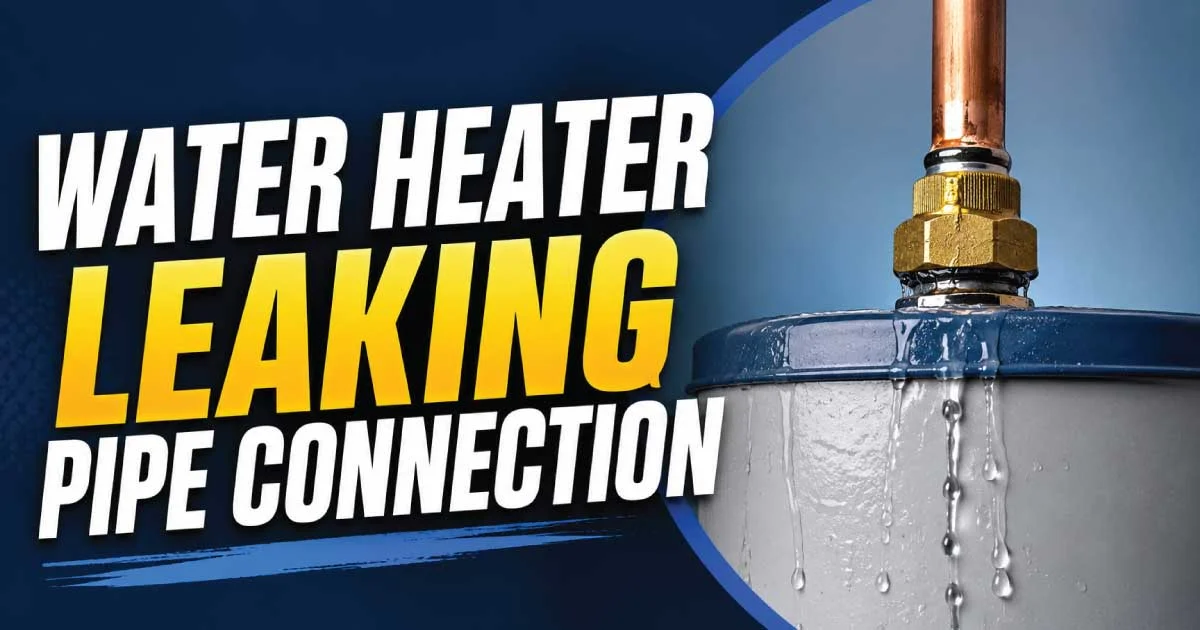
A water heater leaking at the pipe connection is a common household problem that often starts small but can quickly turn into a costly repair if ignored. Many homeowners notice a few drops of water near the top of the heater or dampness around the pipes and assume it’s just condensation. In reality, a leaking pipe connection is usually a warning sign of loose fittings, corrosion, or pressure-related issues that need immediate attention.
This blog post will explain why water heaters leak at pipe connections, how to identify the exact source of the leak, step-by-step repair options, and long-term prevention tips to protect your home from water damage.
Understanding Water Heater Pipe Connections
Water heaters are built to safely hold and heat water under constant pressure, so any leak signals a problem that shouldn’t be ignored. When water escapes from the top, it flows downward, spreading moisture, masking the true source, and often making minor issues appear far more severe than they initially are.
- Cold water inlet pipe – brings cold water into the tank
- Hot water outlet pipe – carries heated water to your faucets
In addition to these, there may be:
- A temperature and pressure (T&P) relief valve pipe
- Recirculation lines (in some systems)
- Expansion tank connections
Leaks often occur at threaded joints, soldered fittings, or where different materials (such as copper and steel) meet. These points are under constant stress from heat, pressure, and water flow.
Common Causes of Water Heater Leaks at Pipe Connections
Pipe connections are among the most common places for water heater leaks to develop. These areas handle constant pressure, temperature changes, and metal movement. Even small weaknesses can allow water to escape, making early identification critical to prevent larger plumbing failures or water damage.
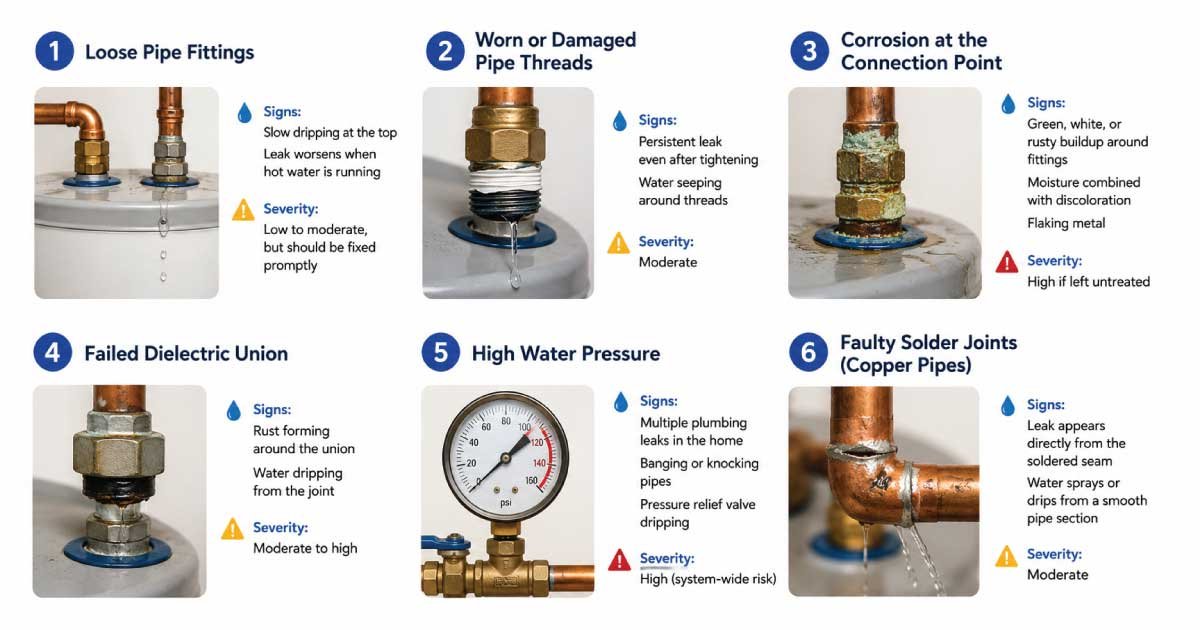
1. Loose Pipe Fittings
As a water heater repeatedly heats and cools water, connected metal pipes naturally expand and contract. Over months or years, this movement can gradually loosen threaded fittings. Even slightly loose connections can allow water to drip, especially when hot water demand increases.
Signs:
- Slow dripping at the top of the water heater
- Leak worsens when hot water is running
Severity: Low to moderate, but should be fixed promptly
2. Worn or Damaged Pipe Threads
Threaded connections depend on intact threads and proper sealing materials to prevent leaks. If threads are worn, cracked, cross-threaded, or sealed incorrectly, water can bypass the seal. Tightening alone may not solve the problem when physical thread damage exists.
Signs:
- Persistent leak even after tightening
- Water seeping around threads
Severity: Moderate
3. Corrosion at the Connection Point
Corrosion commonly develops where pipes meet the water heater, particularly in older installations. When dissimilar metals connect without protection, galvanic corrosion accelerates metal breakdown. This weakens fittings, creates gaps, and often leads to sudden or worsening leaks over time.
Signs:
- Green, white, or rusty buildup around fittings
- Moisture combined with discoloration
- Flaking metal
Severity: High if left untreated
4. Failed Dielectric Union
Dielectric unions act as protective barriers between different metals to reduce corrosion. Over time, these fittings can deteriorate internally or externally. Once they fail, corrosion accelerates rapidly, allowing water to leak from the joint and compromise nearby pipe connections.
Signs:
- Rust forming around the union
- Water dripping from the joint
Severity: Moderate to high
5. High Water Pressure
Excessively high water pressure stresses every part of the plumbing system, including water heater connections. Constant overpressure weakens seals, joints, and fittings, making leaks far more likely. This issue often affects multiple fixtures and should be corrected system-wide.
Signs:
- Multiple plumbing leaks in the home
- Banging or knocking pipes
- Pressure relief valve dripping
Severity: High (system-wide risk)
6. Faulty Solder Joints (Copper Pipes)
Copper pipe systems rely on soldered joints for watertight seals. Poor soldering, age, or repeated thermal stress can cause these joints to crack or separate. Unlike threaded leaks, solder joint failures often worsen quickly and may spray water under pressure.
Signs:
- Leak appears directly from the soldered seam
- Water sprays or drips from a smooth pipe section
Severity: Moderate
How to Identify the Exact Source of the Leak
Before attempting any repair, accurately locating the source of a water heater leak is essential. Water can travel along pipes or fittings, making the problem appear somewhere else entirely. Taking a few careful steps helps prevent misdiagnosis, unnecessary repairs, and overlooked issues that could worsen over time.
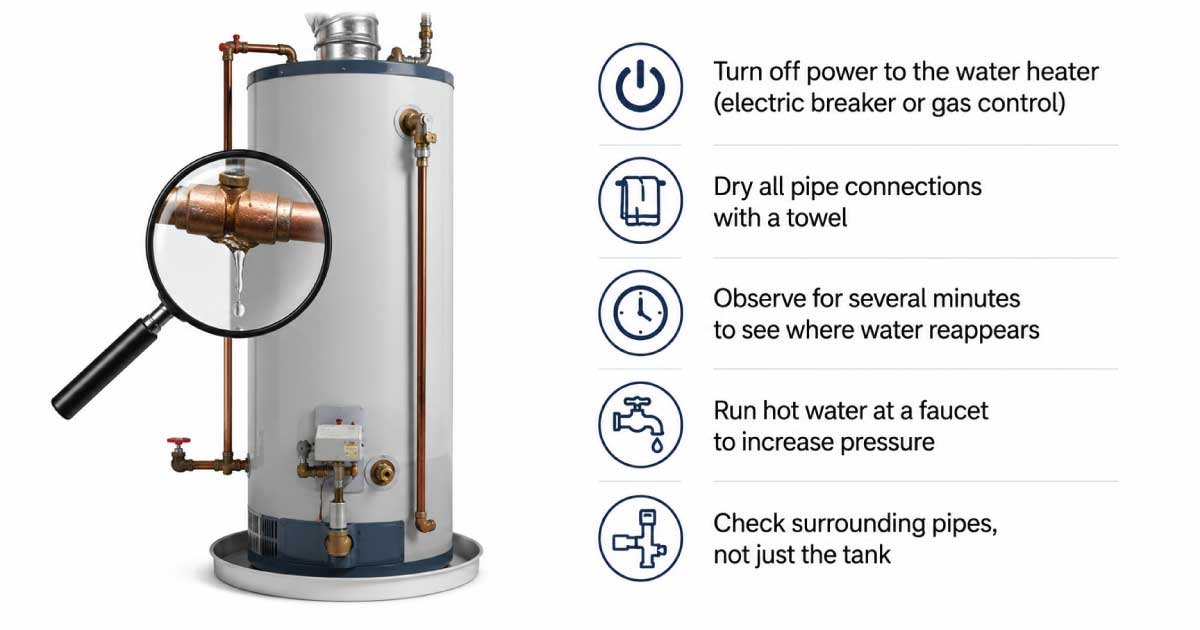
Before attempting repairs, it’s critical to confirm where the leak is coming from.
- Turn off power to the water heater (electric breaker or gas control)
- Dry all pipe connections with a towel
- Observe for several minutes to see where water reappears
- Run hot water at a faucet to increase pressure
- Check surrounding pipes, not just the tank
Sometimes water runs along pipes and drips from a lower point, making the leak appear worse or mislocated.
How to Fix a Leaking Pipe Connection on a Water Heater
Once you’ve identified the exact source of the leak, choosing the correct repair method is critical to prevent further damage. Some fixes are simple and DIY-friendly, while others require tools or experience. Addressing the issue promptly helps extend the life of your water heater and plumbing system.
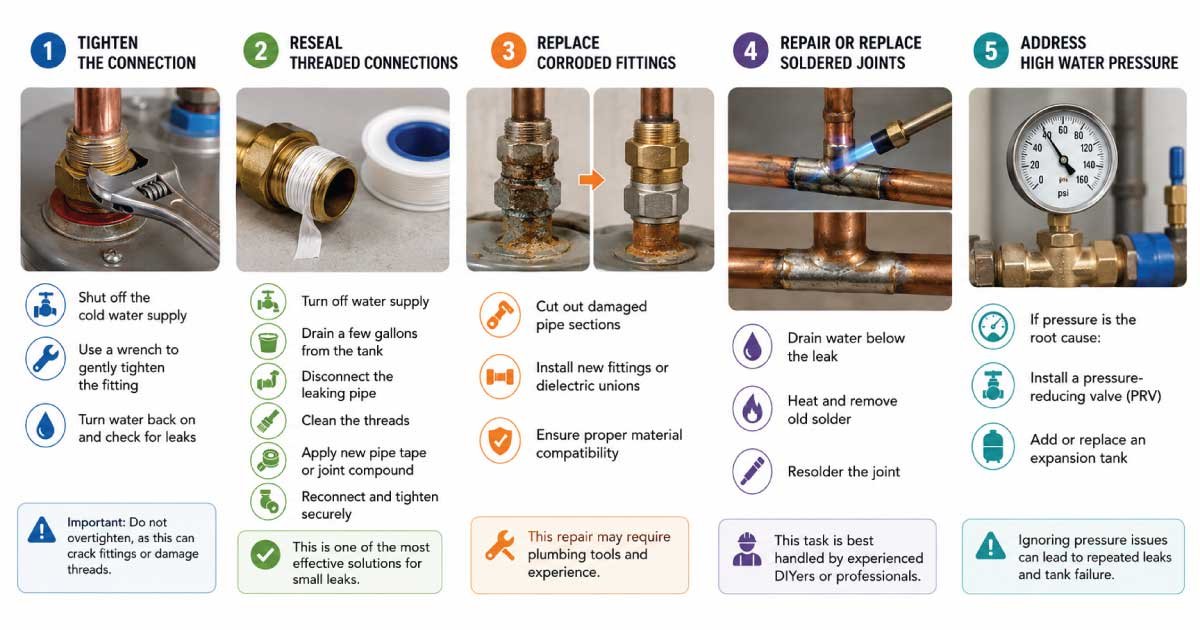
Fix 1: Tighten the Connection
Minor leaks at threaded pipe connections are often caused by fittings that have loosened over time due to vibration, temperature changes, or normal system use. When caught early, gently tightening the connection can stop the leak without requiring disassembly or replacement parts.
Steps:
- Shut off the cold water supply
- Use a wrench to gently tighten the fitting
- Turn water back on and check for leaks
Important: Do not overtighten, as this can crack fittings or damage threads.
Fix 2: Reseal Threaded Connections
When tightening fails to stop a leak, the sealing material inside the threaded joint is often worn or improperly applied. Resealing restores the watertight barrier by replacing old pipe tape or joint compound, making this a highly reliable solution for persistent but localized leaks.
Steps:
- Turn off water supply
- Drain a few gallons from the tank
- Disconnect the leaking pipe
- Clean the threads
- Apply new pipe tape or joint compound
- Reconnect and tighten securely
This is one of the most effective solutions for small leaks.
Fix 3: Replace Corroded Fittings
Corroded fittings indicate material breakdown that sealing or tightening cannot fix. Once corrosion compromises the metal, replacement becomes the safest and most durable option. Ignoring corrosion allows leaks to worsen and increases the risk of sudden fitting failure or pipe separation.
Steps:
- Cut out damaged pipe sections
- Install new fittings or dielectric unions
- Ensure proper material compatibility
This repair may require plumbing tools and experience.
Fix 4: Repair or Replace Soldered Joints
Leaks in soldered copper joints usually result from aging materials, thermal stress, or poor original workmanship. These leaks often progress quickly, so addressing them promptly is important. Proper repair requires draining the line and restoring a solid solder bond.
- Drain water below the leak
- Heat and remove old solder
- Resolder the joint
This task is best handled by experienced DIYers or professionals.
Fix 5: Address High Water Pressure
When leaks keep returning despite proper repairs, excessive water pressure is often the underlying cause. High pressure strains every connection in the system, including the water heater. Correcting pressure issues protects not only fittings but also the tank and appliances.
If pressure is the root cause:
- Install a pressure-reducing valve (PRV)
- Add or replace an expansion tank
Ignoring pressure issues can lead to repeated leaks and tank failure.
🚀 Complete Guide: Everything you need to know. 👉
When to Call a Professional Plumber
While many water heater pipe connection leaks can be handled with basic tools, some situations require trained expertise. Ongoing leaks, visible corrosion, or system-wide issues often indicate deeper problems. Calling a professional plumber early can ensure safe repairs, code compliance, and protection against costly long-term damage.
Call a plumber if:
- The leak persists after tightening or resealing
- Corrosion is extensive
- Pipes need cutting or soldering
- Water pressure problems exist
- You’re unsure of the leak source
Professional repair may cost more upfront but can prevent expensive water damage later.
Risks of Ignoring a Leaking Water Heater Connection
Ignoring a leaking water heater connection allows moisture to spread gradually, often out of sight. What starts as a slow drip can weaken materials, promote corrosion, and create unhealthy conditions. Delaying repairs increases the risk of structural damage, higher repair costs, and unexpected water heater failure.
Even a small leak can cause significant problems over time, including:
- Mold growth
- Ceiling and wall damage
- Rusted water heater components
- Structural wood rot
- Increased energy bills
- Complete water heater failure
Water damage spreads silently, especially in basements or utility closets.
Preventing Future Water Heater Pipe Leaks
Preventing water heater pipe leaks is far easier and less expensive than repairing water damage after a failure. Routine maintenance, proper installation practices, and early replacement of aging parts help reduce stress on connections, limit corrosion, and ensure your water heater operates safely and efficiently for years.
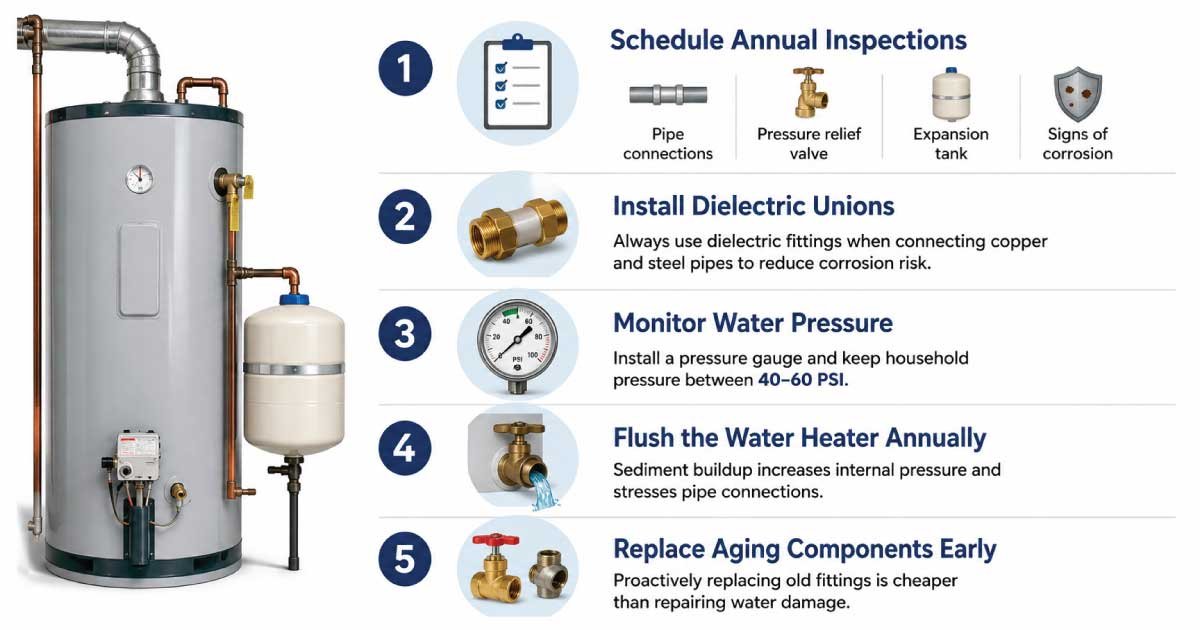
1. Schedule Annual Inspections
Regular annual inspections help catch small issues before they turn into leaks or major failures. A trained professional can spot early signs of wear, pressure problems, or corrosion that homeowners often miss, helping extend the life of both the water heater and connected plumbing.
Have a professional inspect:
- Pipe connections
- Pressure relief valve
- Expansion tank
- Signs of corrosion
2. Install Dielectric Unions
Dielectric unions play a critical role in preventing corrosion when different metals are connected in a plumbing system. Without them, electrochemical reactions can rapidly degrade fittings, increasing leak risk. Proper installation significantly slows corrosion and protects pipe connections over the long term. Always use dielectric fittings when connecting copper and steel pipes to reduce corrosion risk.
3. Monitor Water Pressure
Consistently high water pressure puts unnecessary strain on water heater connections and household plumbing. Monitoring pressure allows you to correct problems early, reducing leaks and extending system lifespan. Maintaining proper pressure also improves appliance performance and overall plumbing reliability. Install a pressure gauge and keep household pressure between 40–60 PSI.
4. Flush the Water Heater Annually
Annual flushing removes sediment that naturally accumulates inside the tank over time. Excess sediment increases internal pressure and heat stress, which can weaken fittings and pipe connections. Regular flushing improves efficiency while reducing strain on critical components. Sediment buildup increases internal pressure and stresses pipe connections.
5. Replace Aging Components Early
Plumbing components wear down gradually, often failing without warning once they reach a certain age. Replacing fittings, valves, or connectors early prevents sudden leaks and water damage. Proactive replacement is far more cost-effective than repairing walls, floors, or ceilings later. Proactively replacing old fittings is cheaper than repairing water damage.
🚀 Complete Guide: Everything you need to know. 👉
Is a Leaking Pipe Connection a Sign You Need a New Water Heater?
Not always. A leak at the pipe connection is often a plumbing issue rather than a tank failure. However, if the water heater is over 10–12 years old and shows widespread corrosion, replacement may be the more cost-effective solution.
Key indicators replacement may be needed:
- Rust on the tank itself
- Frequent leaks
- Poor heating performance
- Rising repair costs
Final Thoughts
A water heater leaking at the pipe connection should never be ignored, even if the leak appears small. What starts as a minor drip can quickly escalate into severe water damage or complete system failure. By understanding the common causes, identifying the leak source early, and performing timely repairs, homeowners can extend the life of their water heater and avoid unnecessary expenses.
Whether you choose a DIY fix or professional repair, prompt action is the key. Regular maintenance, proper installation, and pressure control are your best defenses against future water heater pipe connection leaks.